TRUESigner ONE integration with Keka
Here’s a step-by-step guide on how to use TRUESigner ONE from HubSpot:
Step 1: Log in to Keka
- Start by logging into your Keka account using your organization credentials.
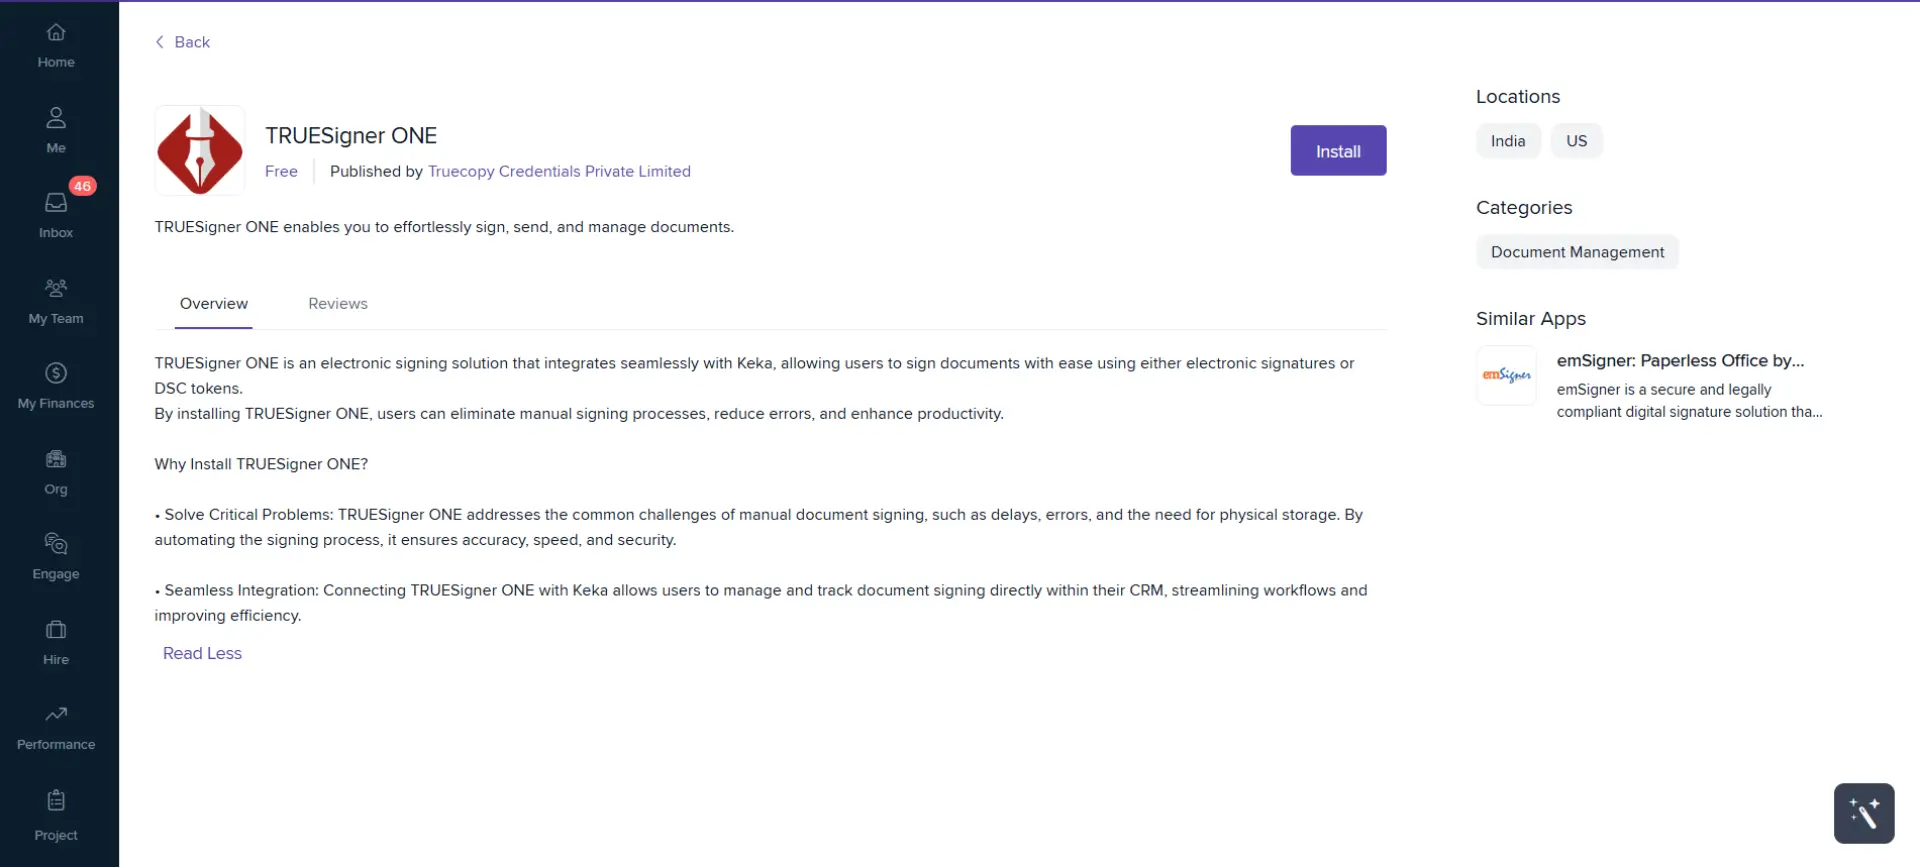
Step 2: Install TRUESigner ONE
- Go to the Keka App Marketplace.
- Search for “TRUESigner ONE”.
- Click Install App and follow the on-screen instructions to complete the installation.
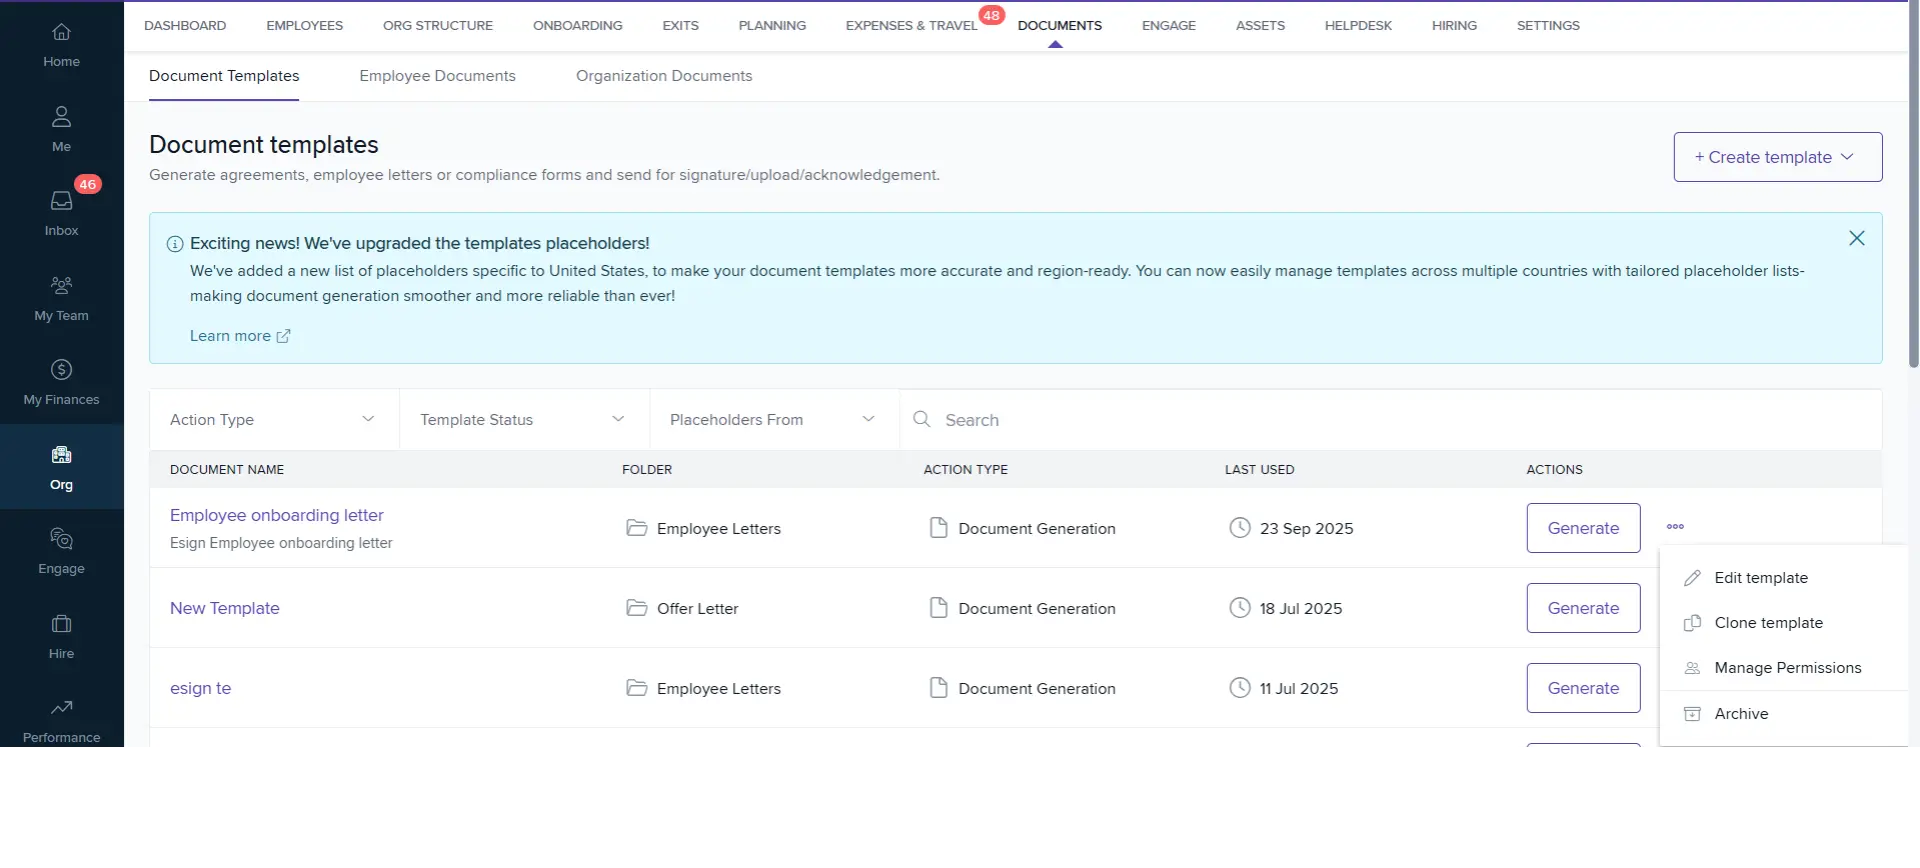
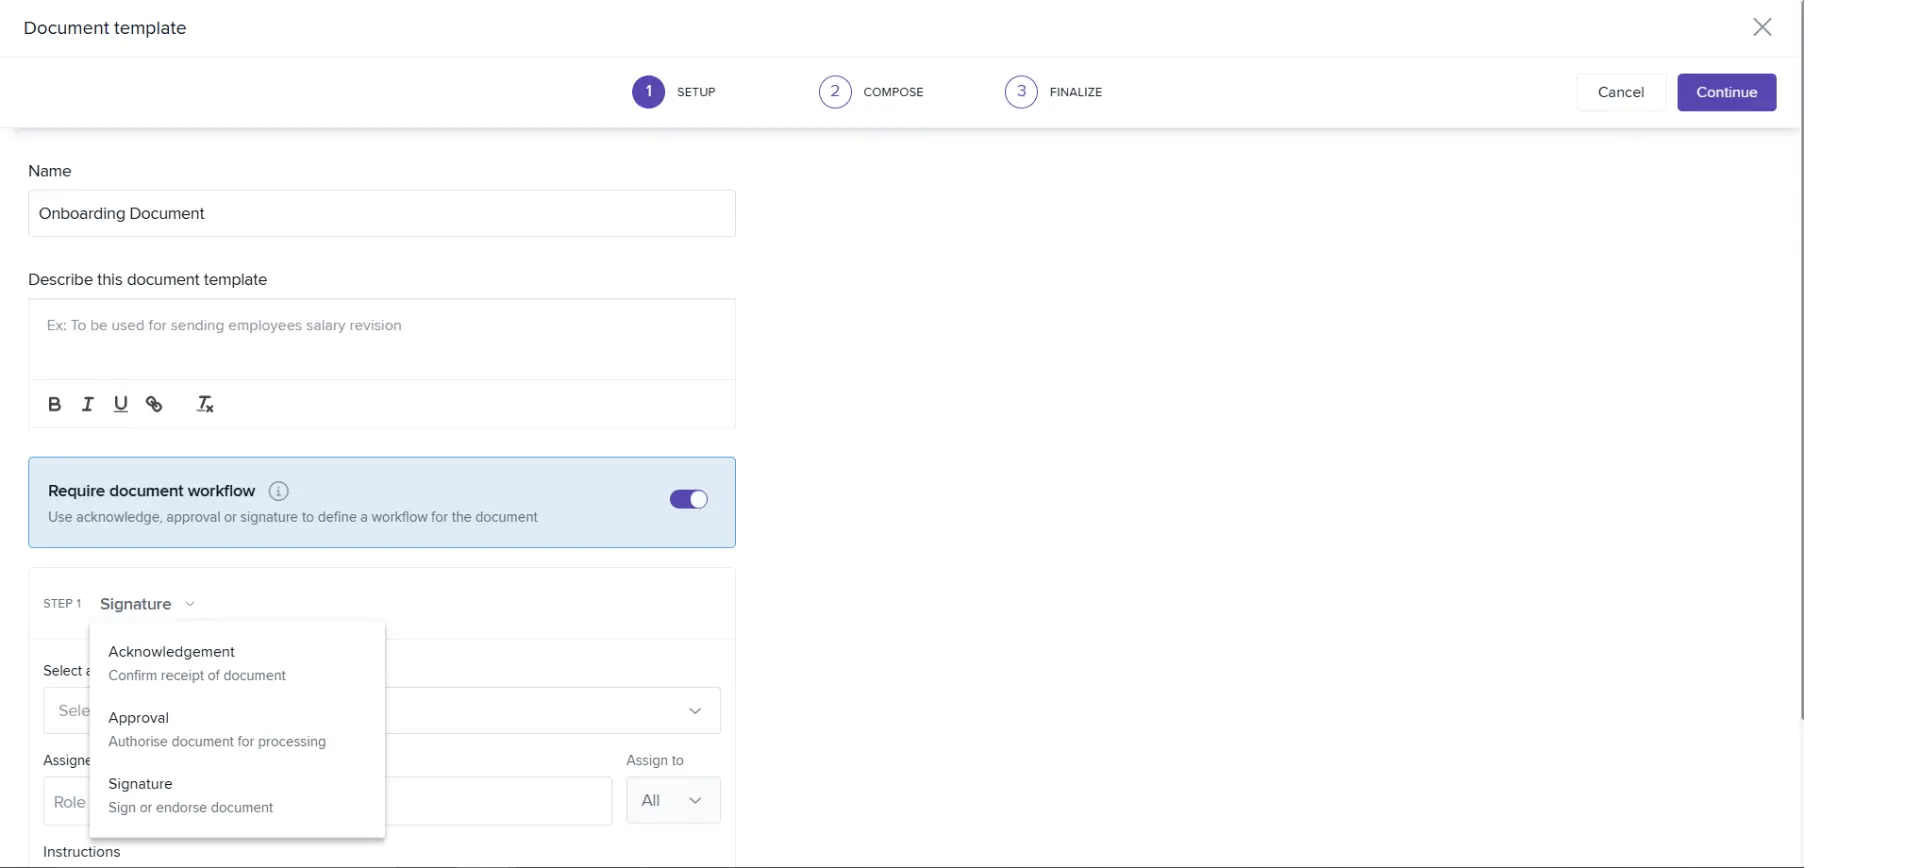
Step 3: Create or Edit a Document Template for Signing
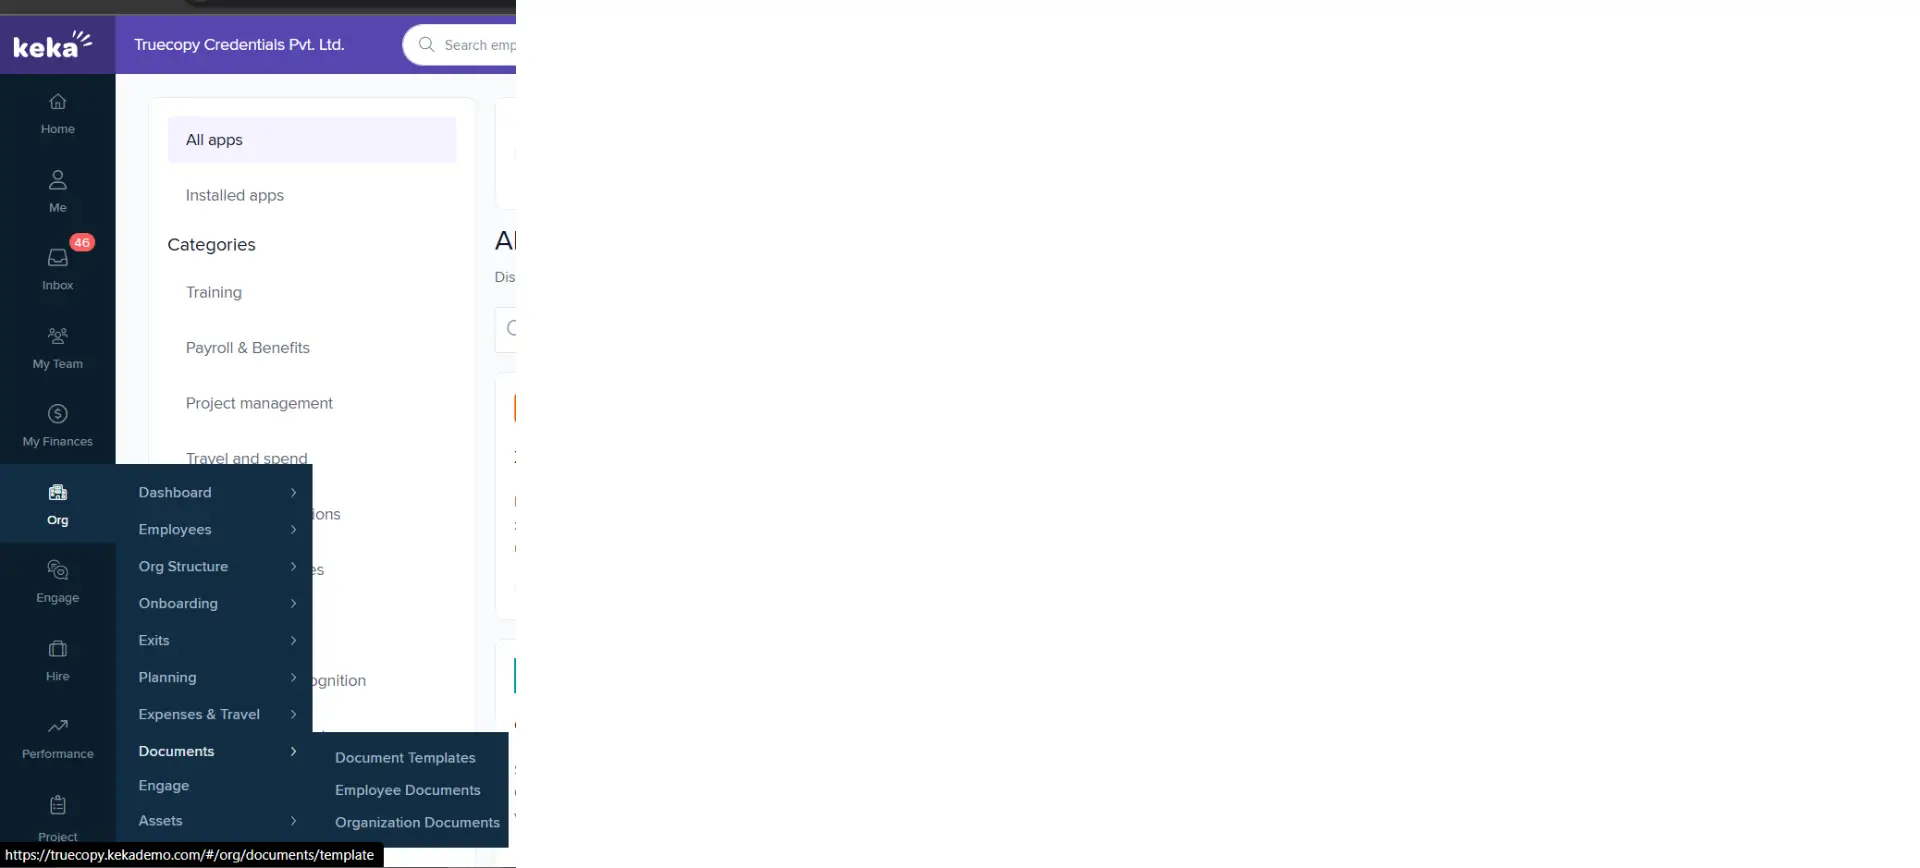
- Navigate to Org → Documents → Document Templates in Keka.
- Either create a new template or edit an existing one.
- Enable “Require Document Workflow.”
- In Step 1 (Workflow Setup):
- Under Select an Action, choose Signature.
- Under Select a Digital Signature Provider, choose TRUESigner ONE.
- Under Select Assignees, choose Employee (or any relevant role).
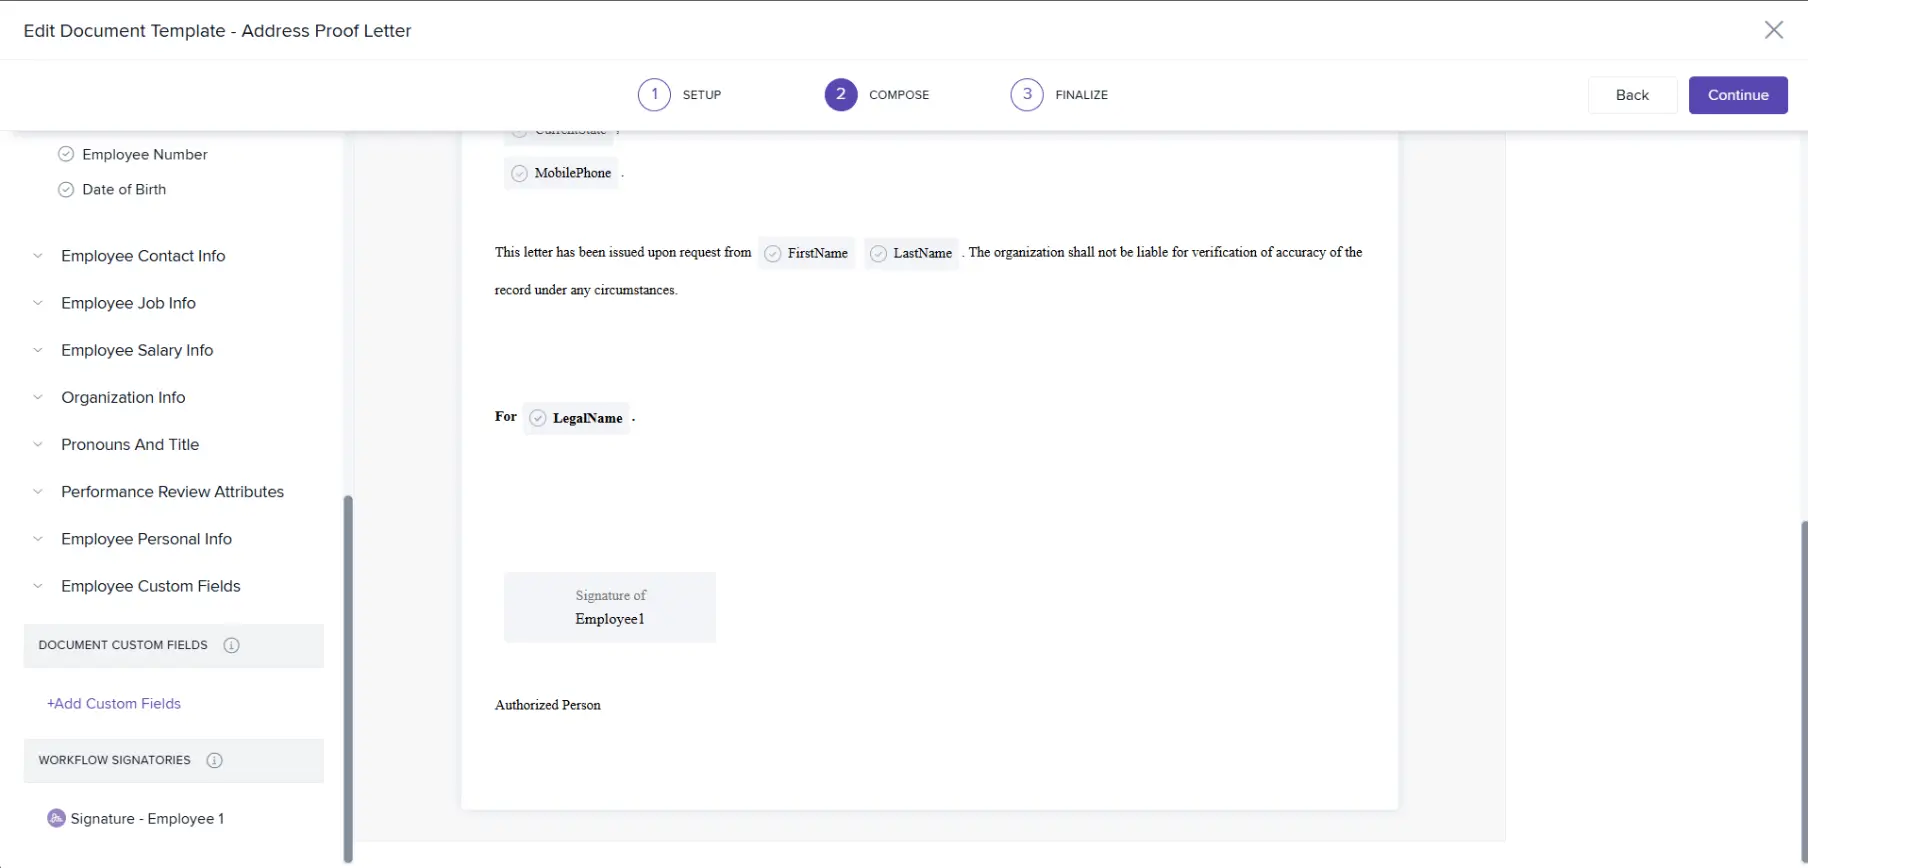
- In Step 2 (Compose Template):
- Add the required signature placeholders.
- To add a signature field, choose Workflow Signatories → Signature – Employee 1 (or relevant signer).
- Save your template once all fields are configured.
Step 4: Initiate a Signing Request
- Go to your Documents section and select the template created for signing.
- Click Generate.
- Select the employees for whom you want to initiate the signing request.
- Check the option “Save document to employee folder.”
- Click Generate to send signing requests.
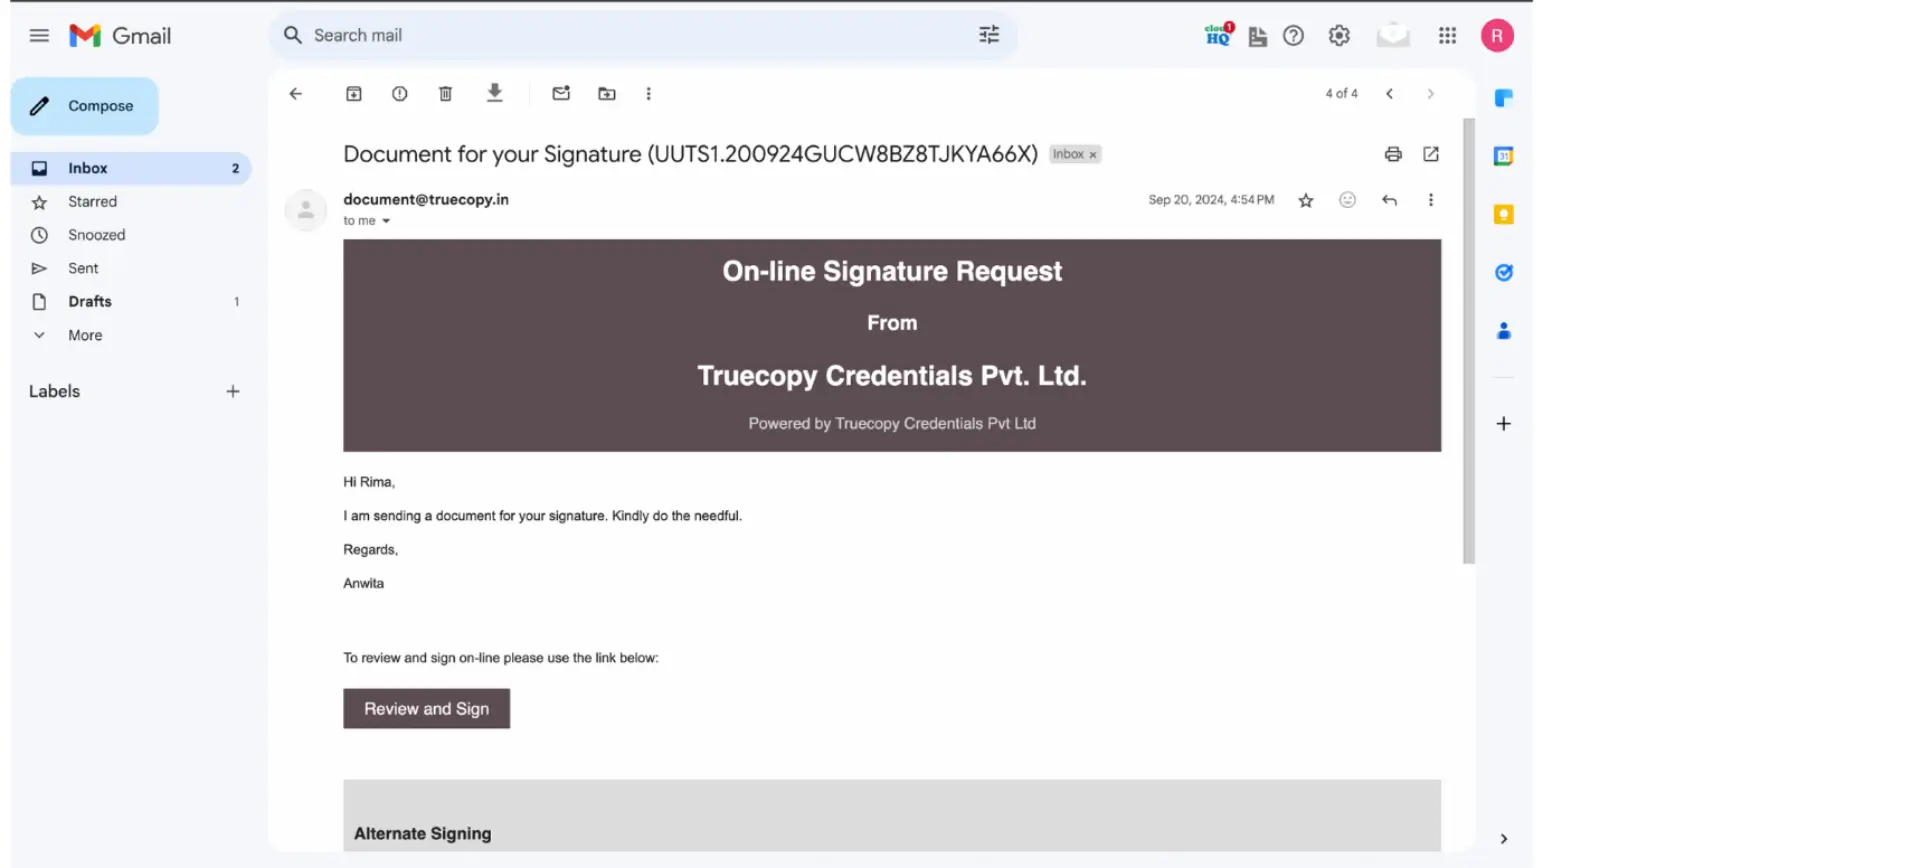
- The signers will receive a signing link via email.
Step 5: Sign the Document
- The signer clicks on the “Review and Sign” button in the received email.
- They will be redirected to a secure signing page.
- After reviewing the document, they can accept the Terms of Service and add their signature.
Click on create Template or chose your existing template and choose edit template
- Enable the Require document workflow.
- In step 1 choose select an action > Signature
- Select a digital signature provider > TRUESigner ONE.
- Select the Assignees > Employee
After that you can compose the Template as you wanted
Then in 2nd Compose step to add the signature locations of signer choose Workflow Signatories > click on Signature – Employee 1
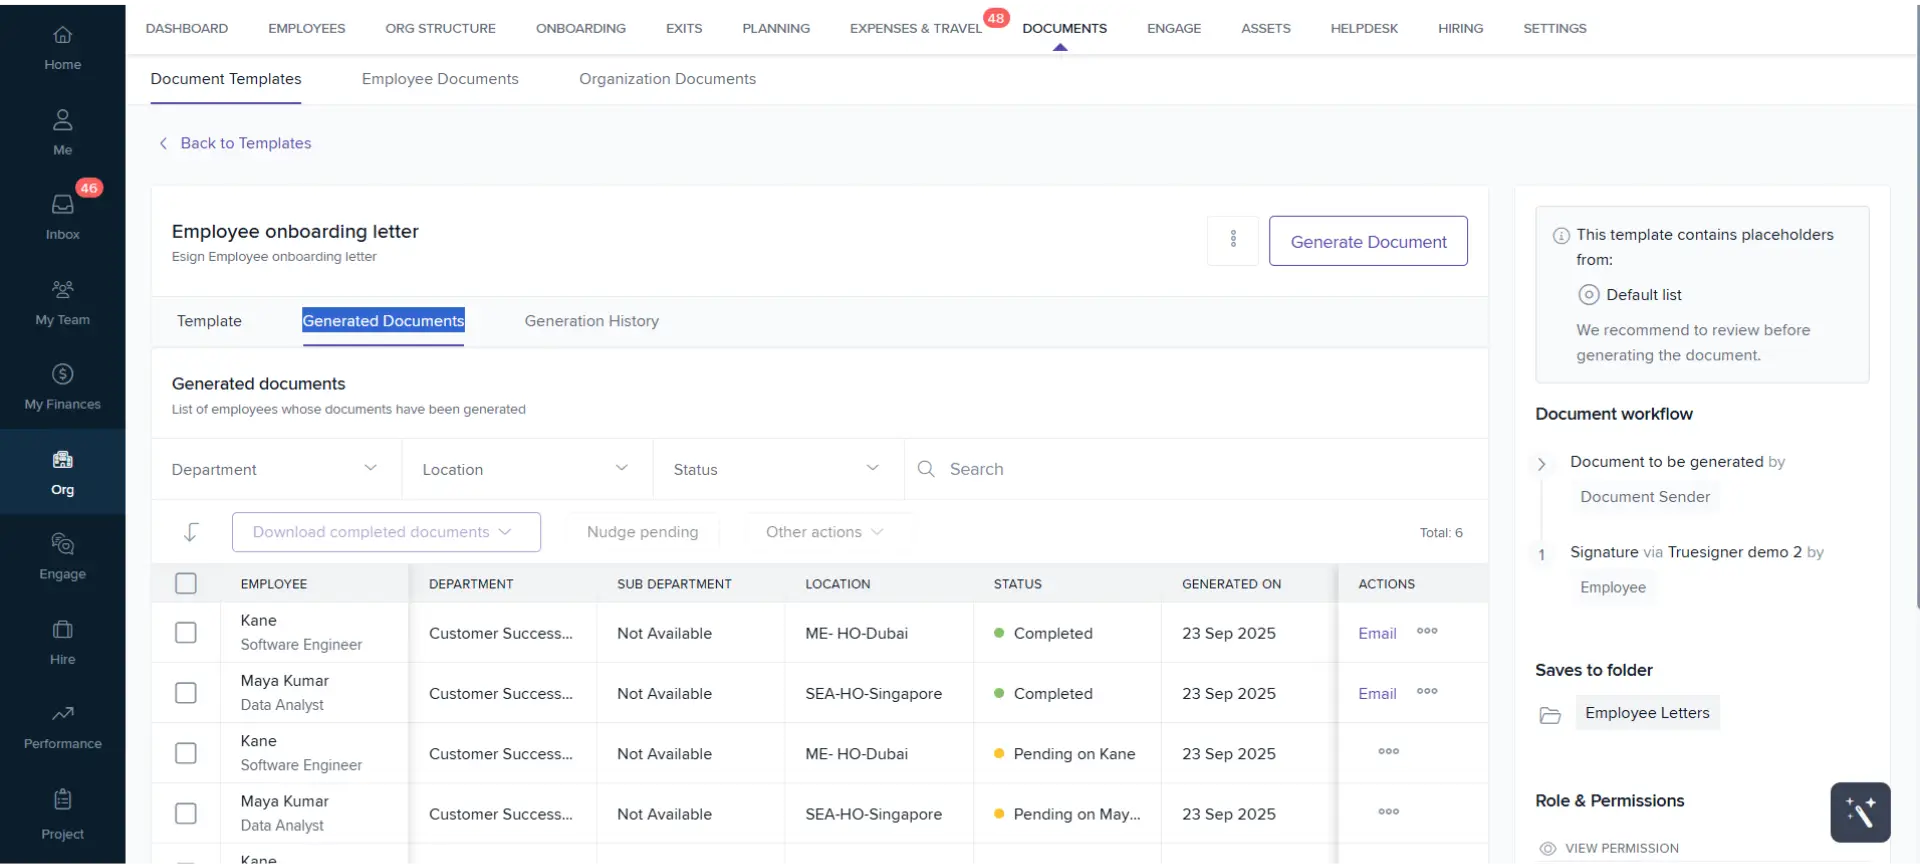
Step 6: Track Document Status
- Go to your Document Template → Generated Documents tab.
- You can view:
- The status of each document (e.g., Pending, Signed).
- The signed file, which is automatically uploaded to Keka.
- From this tab, you can also view or email the signed document directly.
Step 7: Manage Signed Documents
- All signed documents are securely stored in the employee’s folder within Keka.
- HR or Admins can view, download, or resend documents as needed.
- Track Signing Status:
- You can track the document signing status by clicking on document template > Generated Documents.
- The signed file is then available in the attachments in Keka.