
TRUESigner ONE for Zoho Books
User Guide & Documentation
1. Introduction
TRUESigner ONE for Zoho Books enables users to digitally sign business documents such as invoices, sales orders, purchase orders, and credit notes directly from Zoho Books. The extension seamlessly integrates with the TRUESigner ONE platform, allowing users to initiate, track, and store signed documents without leaving Zoho Books.
This guide explains the complete installation process and step-by-step usage of the extension.
2. Installation Guide
Step 1: Install the Extension
1. Click Install on the TRUESigner ONE extension from the Zoho Marketplace.
2. You will be redirected to the installation screen.
3. Select the Zoho Books Organization where you want to install the extension.
4. Review and accept the Terms and Conditions.
5. Click Next to proceed.
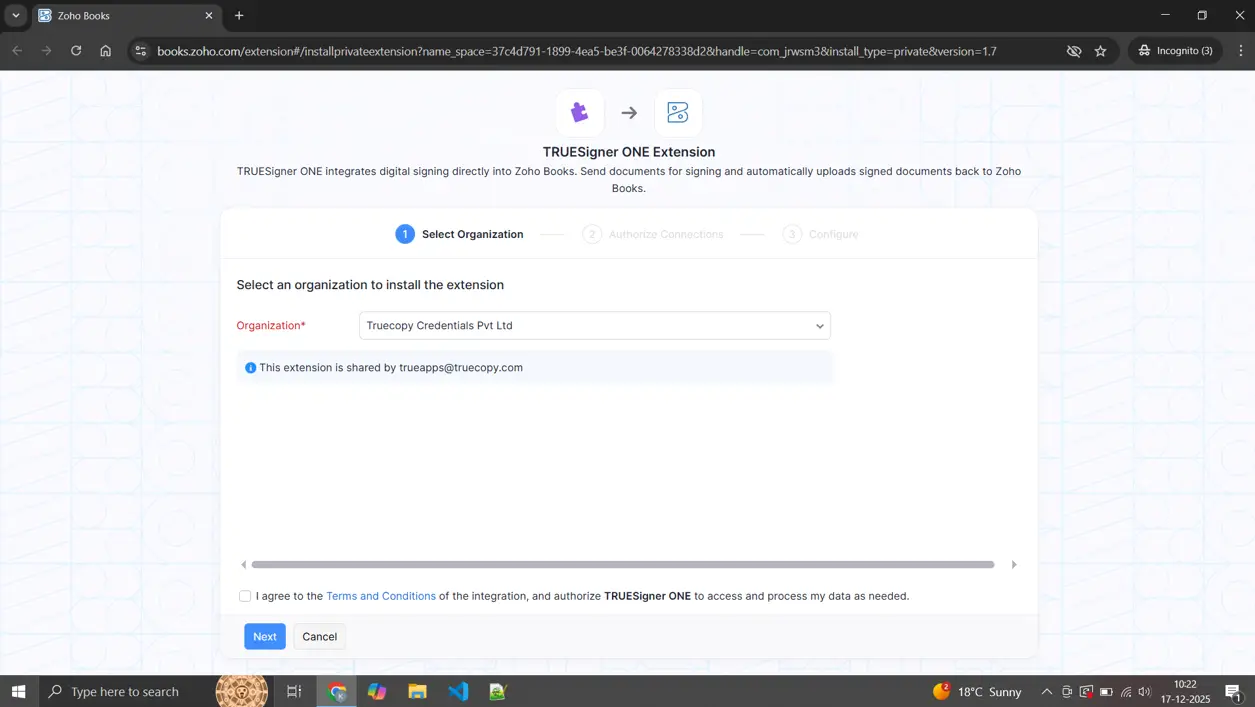
Step 2: Grant Zoho Books Connection Access
The extension requires access to Zoho Books to fetch document details during the signing process.
Step 2.1: Connect Zoho Books
1. Click on Connect to authorize the Zoho Books connection.
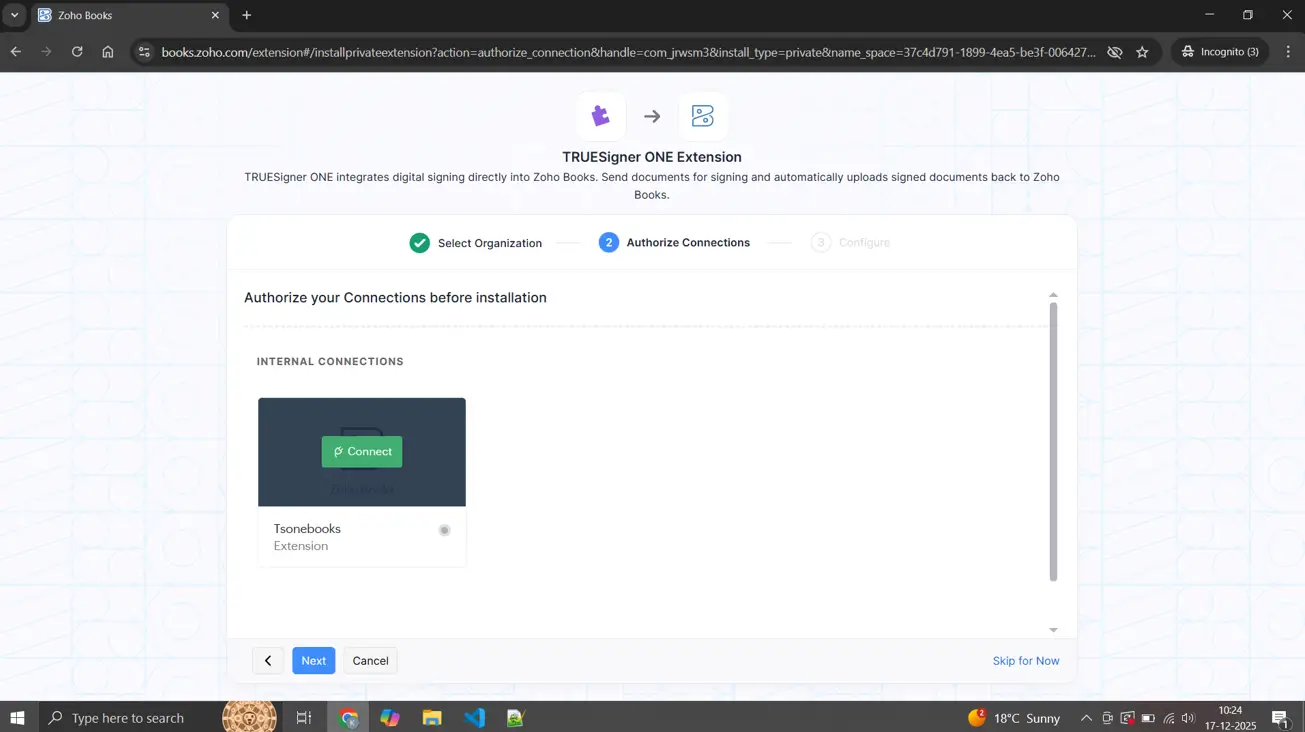
2. You will be redirected to the Zoho authentication page.
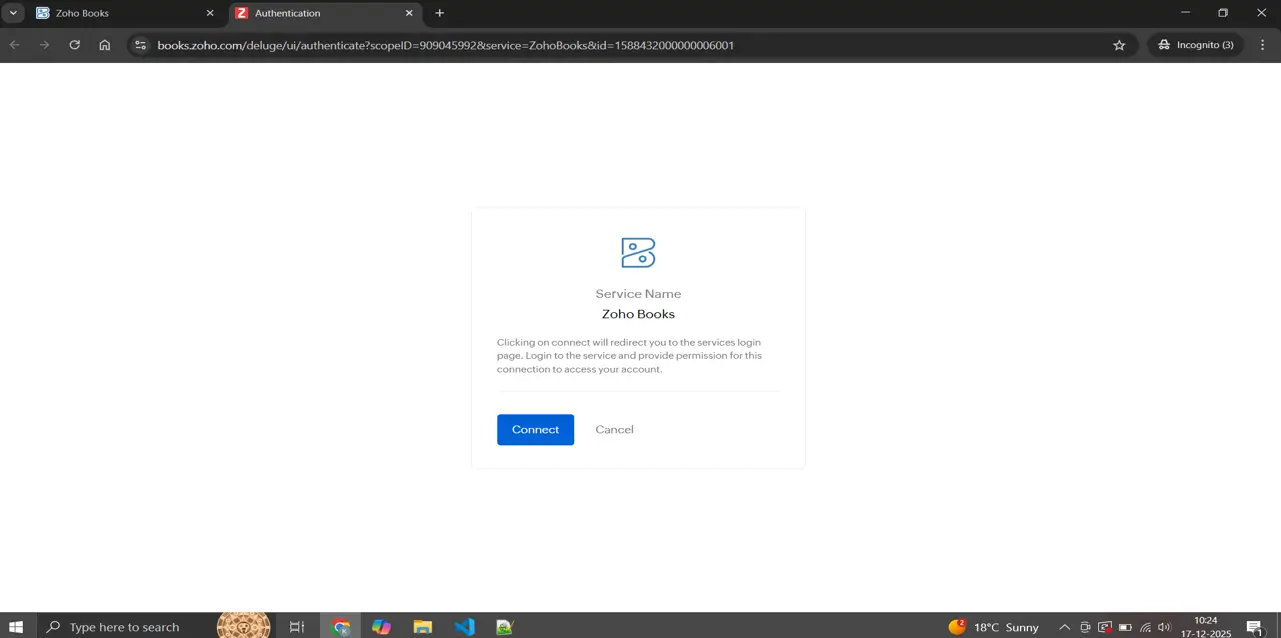
Step 2.2: Authorize Permissions
1. Review the requested scopes carefully.
2. Select all required permissions.
3. Check the Allow option.
4. Click Accept to grant access.
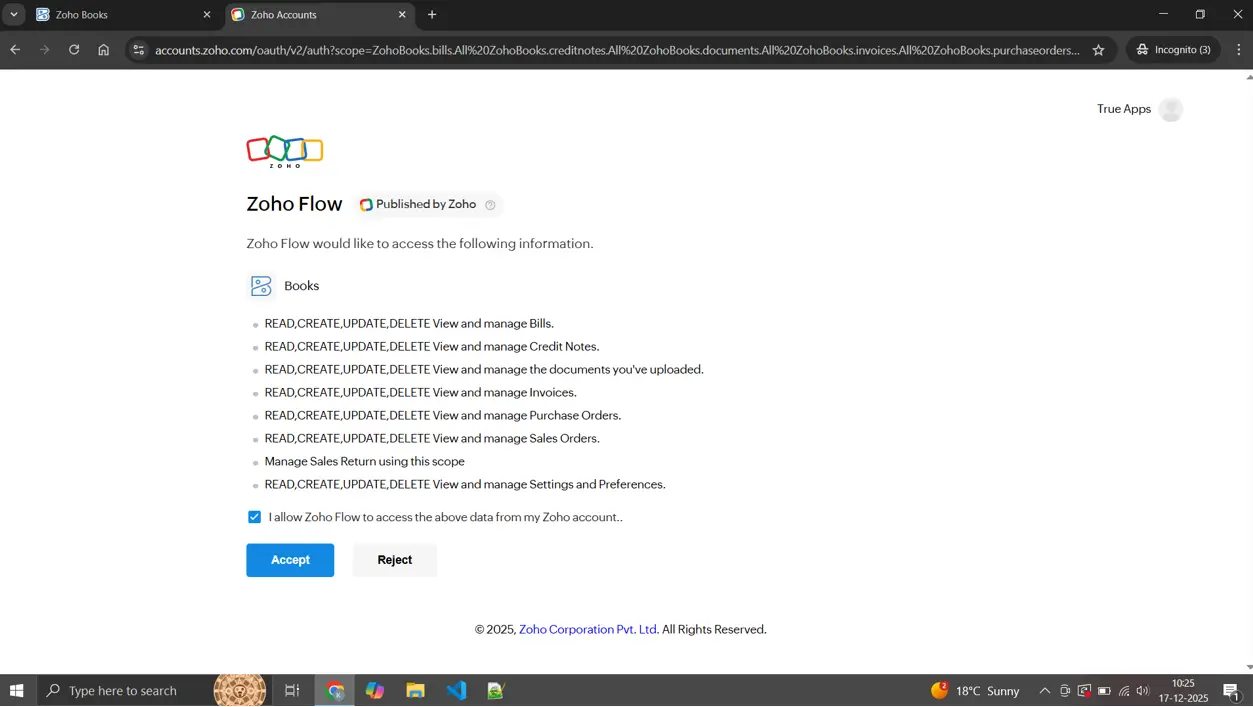
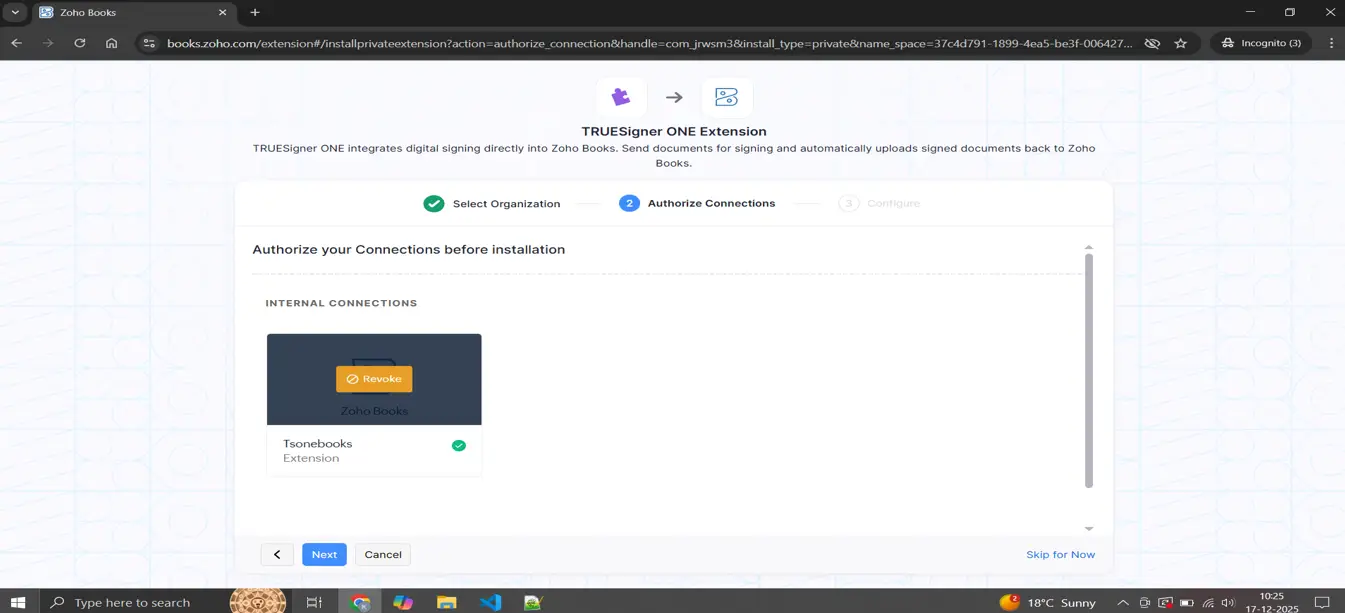
Step 2.3: Verify Connection
• Once the connection is successfully established, a green checkmark will appear next to the connection.
• Click Next to continue.
Step 3: Configure TRUESigner ONE Credentials
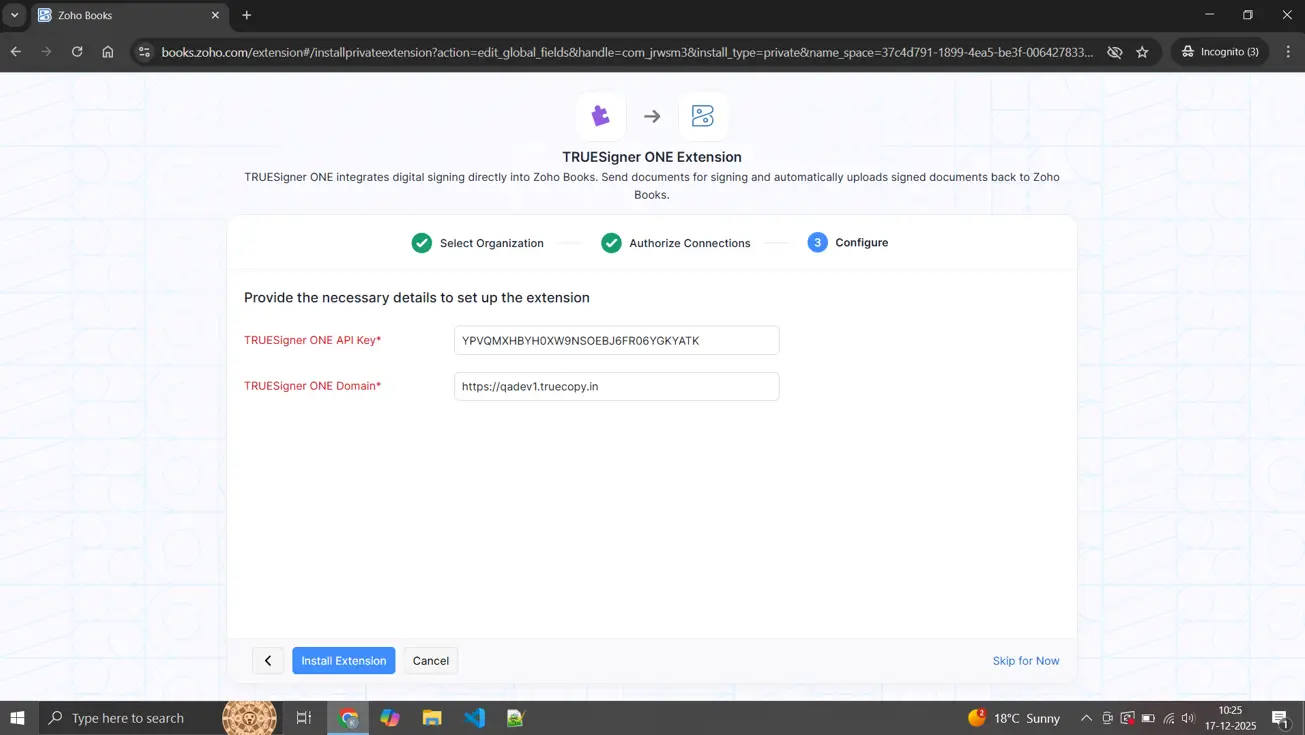
This is a mandatory and critical step to enable document signing.
1. Enter your TRUESigner ONE Domain.
2. Enter your TRUESigner ONE API Key.
3. Both credentials are required to use TRUESigner ONE services.
Note: If you do not have TRUESigner ONE credentials, please contact the TRUESigner team at: – apps@truecopy.com – sales@truecopy.com
Once the credentials are entered correctly, complete the installation.
3. Using the TRUESigner ONE Extension
Step 1: Open a Document in Zoho Books
1. Log in to your Zoho Books account.
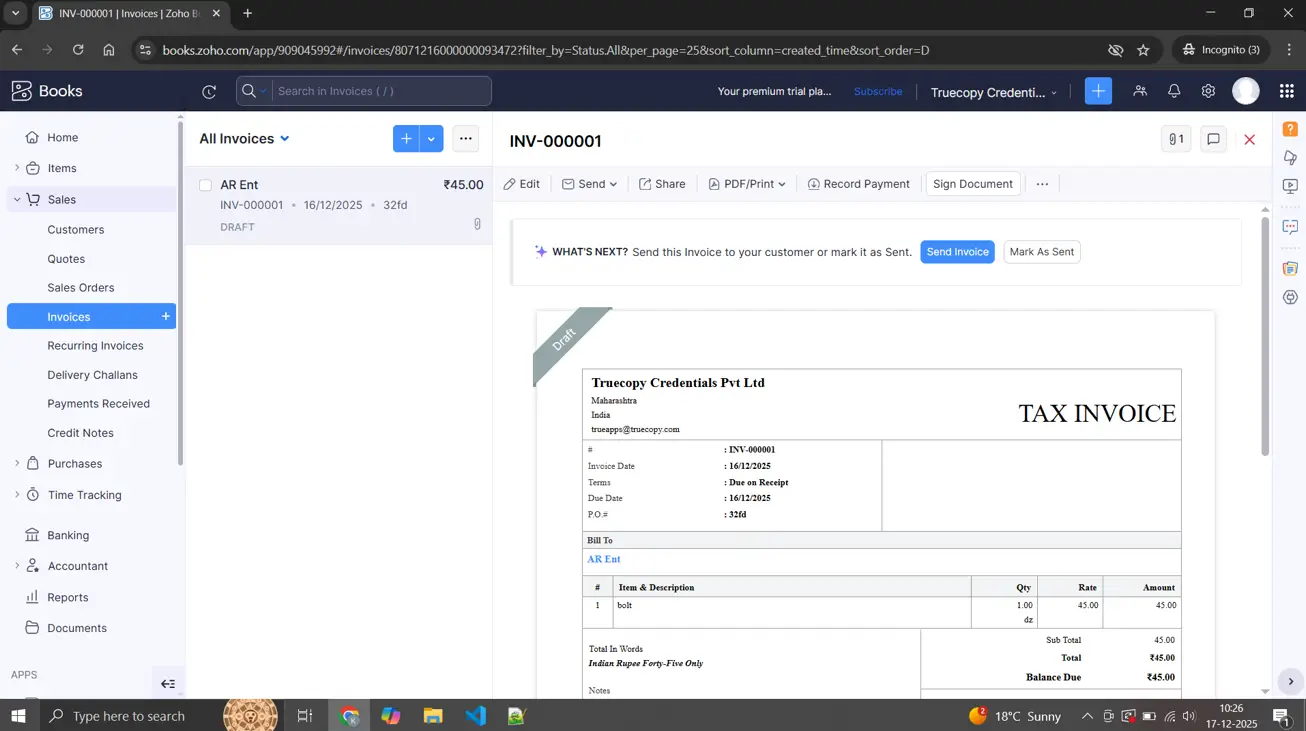
2. Navigate to the Sales section.
3. Open any of the supported modules:
- Sales Orders
- Invoices
- Purchase Orders
- Credit Notes
4. Click on any record to view its details.
5. In the top action bar, click Sign Document.
Step 2: Configure Signing Details
1. Once you click Sign Document, the TRUESigner ONE widget will appear.
2. Select the Signature Type.
3. Review the list of Signers:
- By default, predefined signers may be populated.
- You can edit, add, or remove signers based on your signing workflow.
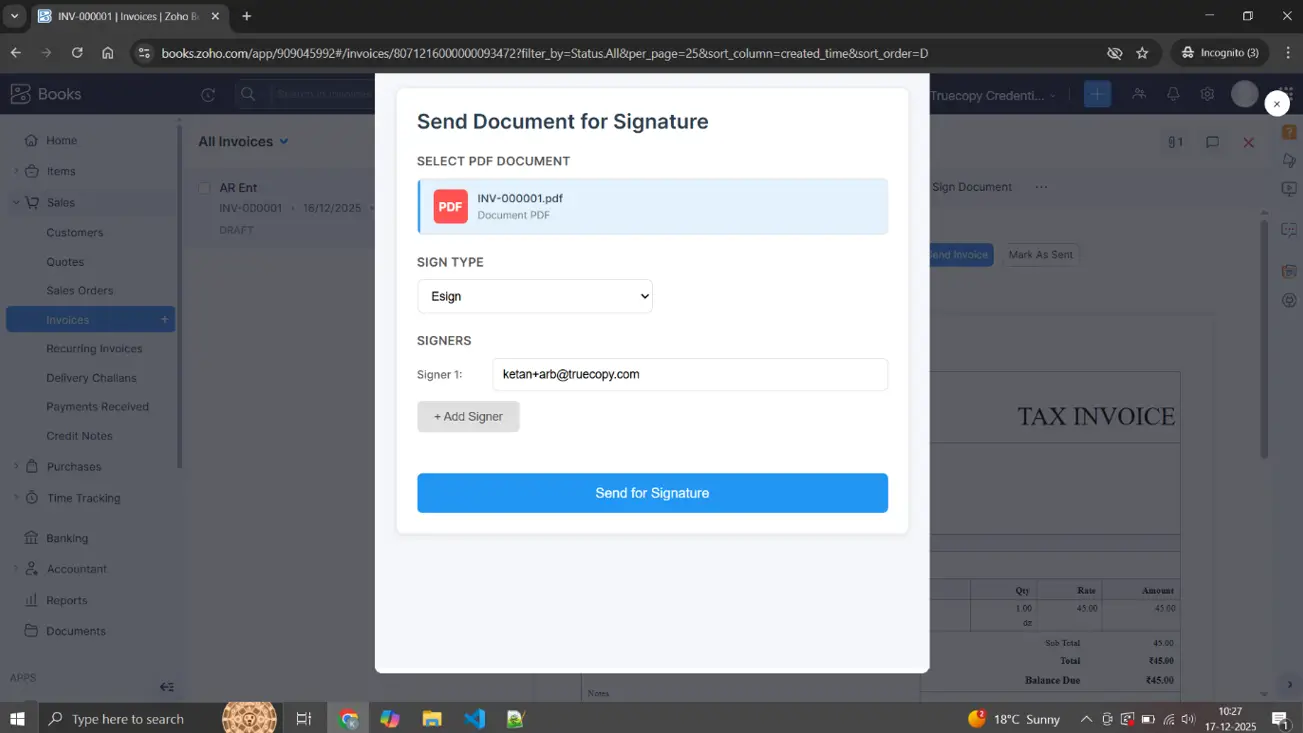
4. After verifying all details, click Send for Signature.
4. Signing & Completion Flow
1. All selected signers will receive an email notification with a secure signing link.
2. Each signer can open the link and complete the signing process.
3. Once all participants have signed the document:
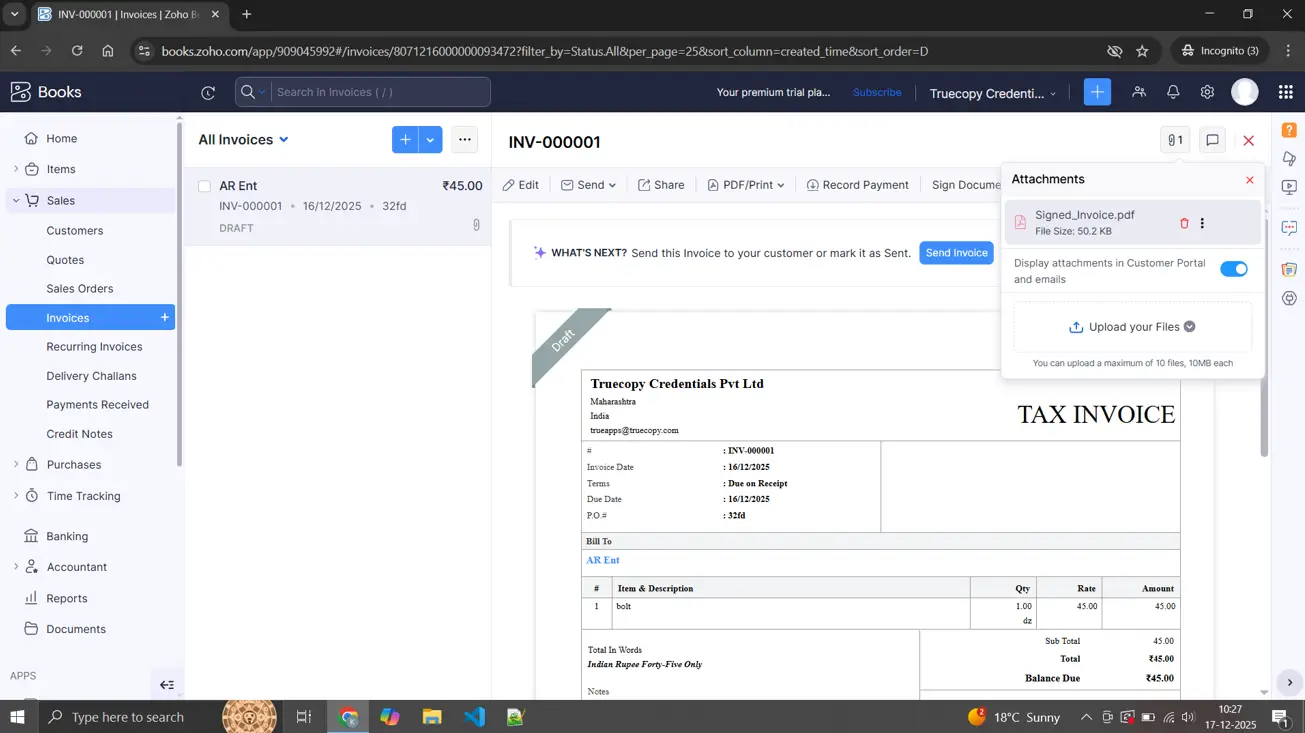
- The fully signed document is automatically sent back to Zoho Books.
- The signed file is stored in the Attachments section of the respective record.
4. You can now share or send the document (for example, an invoice) along with the signed attachment.
5. Benefits of Using TRUESigner ONE
• End-to-end digital signing within Zoho Books
• No manual download or upload of documents
• Secure and compliant signing workflow
• Automatic storage of signed documents
• Faster approvals and improved operational efficiency
6. Support
For any questions, credential requests, or support related to TRUESigner ONE, please contact:
• Email: apps@truecopy.com
• Sales: sales@truecopy.com