Help
How to send your documents for electronic signatures with TRUESigner ONE Lite
Looking to sign a letter, a contract, or an agreement? TRUESigner ONE Lite allows you to seamlessly sign, send, and track documents. Signatures done using the solution are compliant with eIDAS (European Union), eSIGN (USA), and IT Act 2000/2008 (India).
Get your documents signed faster, improve efficiency, and enhance collaboration with this solution.
Try TRUESigner™ ONE Lite today!
1. To create a TRUESigner ONE Lite account, visit https://ts1.truecopy.in/initiatorlt.
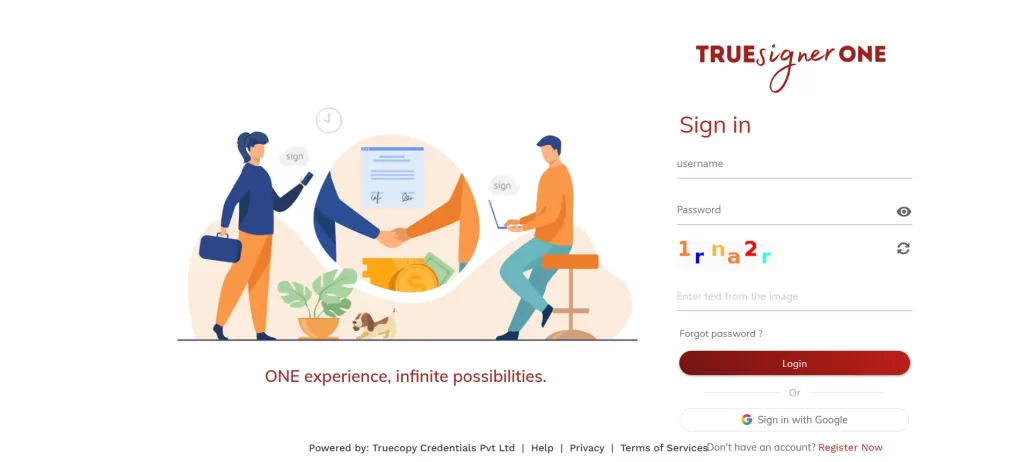
2. Login using your Google credentials.
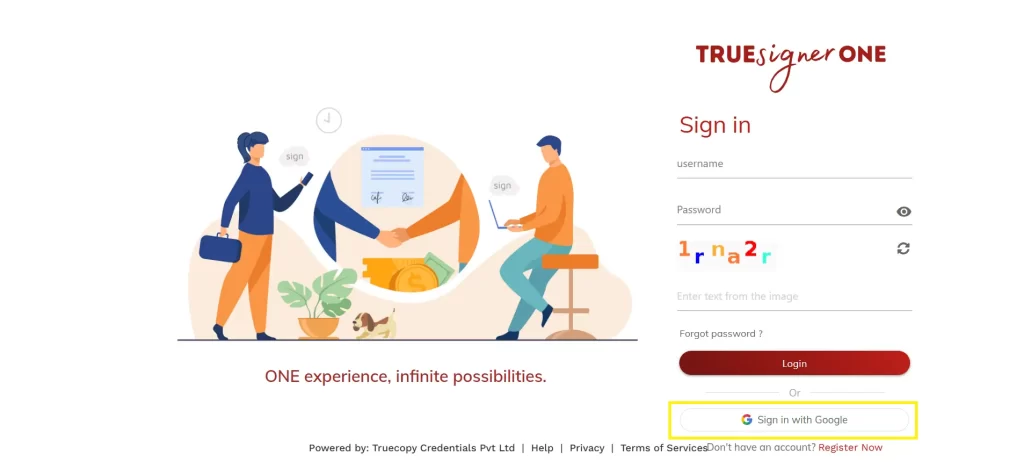
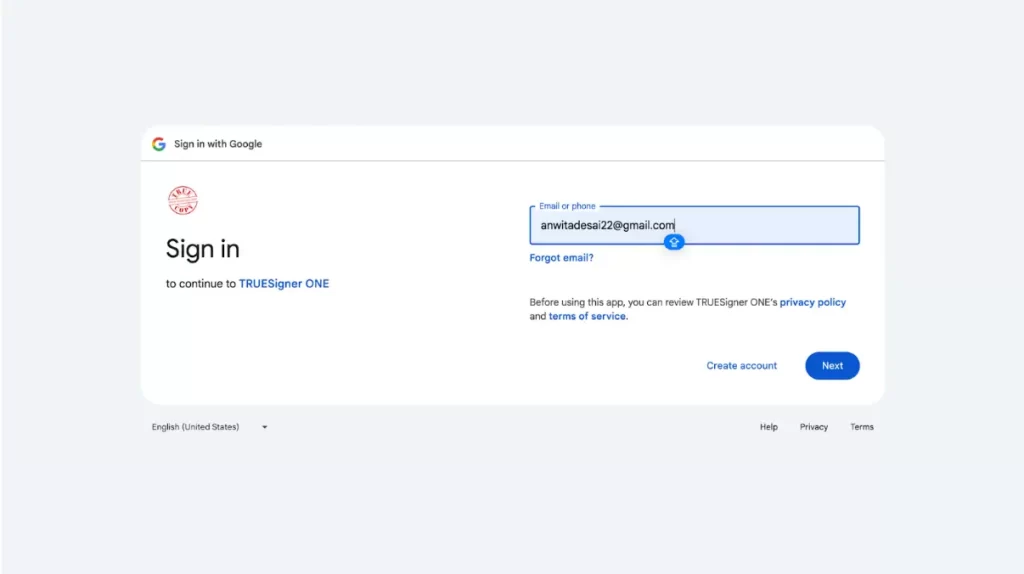
3. Add your Gmail address to create your TRUESigner ONE Lite account.
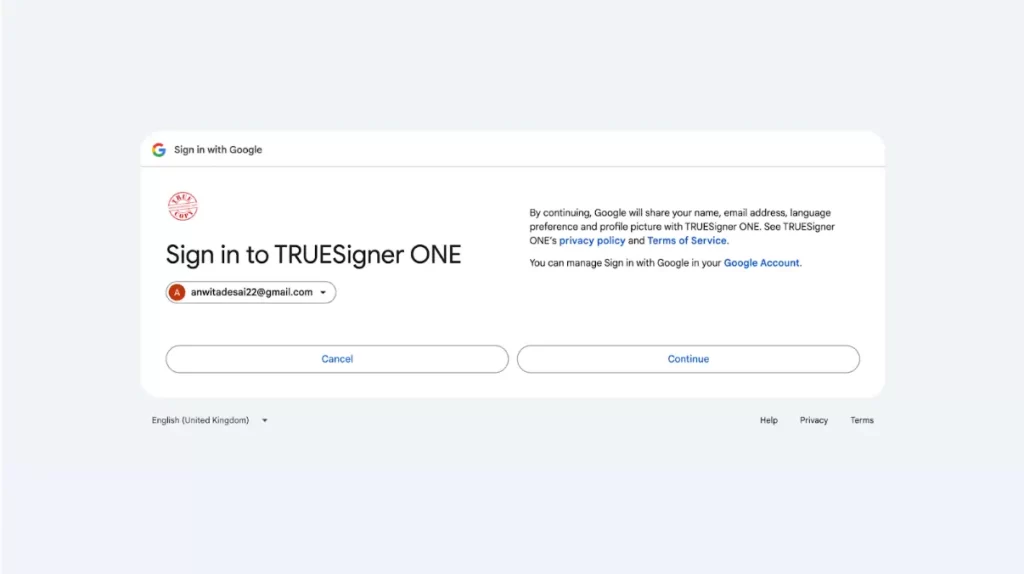
4. Give the required permissions, read the Privacy policy, and accept the ‘Terms of Service’ to create your account. Click on ‘Continue’ to proceed.
5. On successful creation of your account, you will receive a credit of 20 signatures (Electronic signatures or signatures using a DSC token). You can start initiating the files for signatures. To initiate the first document, browse and select the PDF file you want to send for signing.
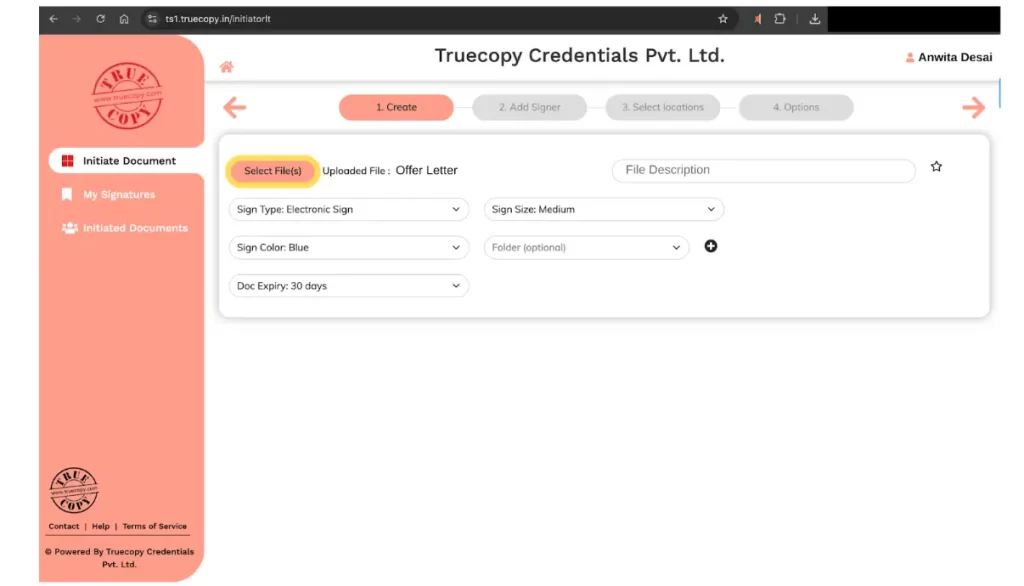
6. After selecting the file, you can choose the signature type (Electronic signature/signature using a DSC token) and add details like file description, sign size, signature color, and expiry of document signing link (these details are not mandatory).
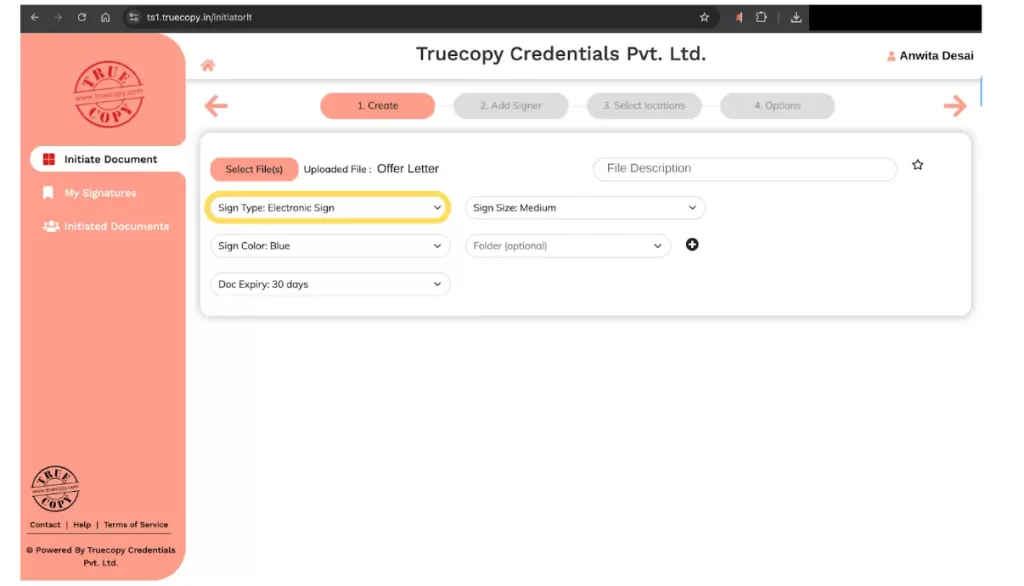
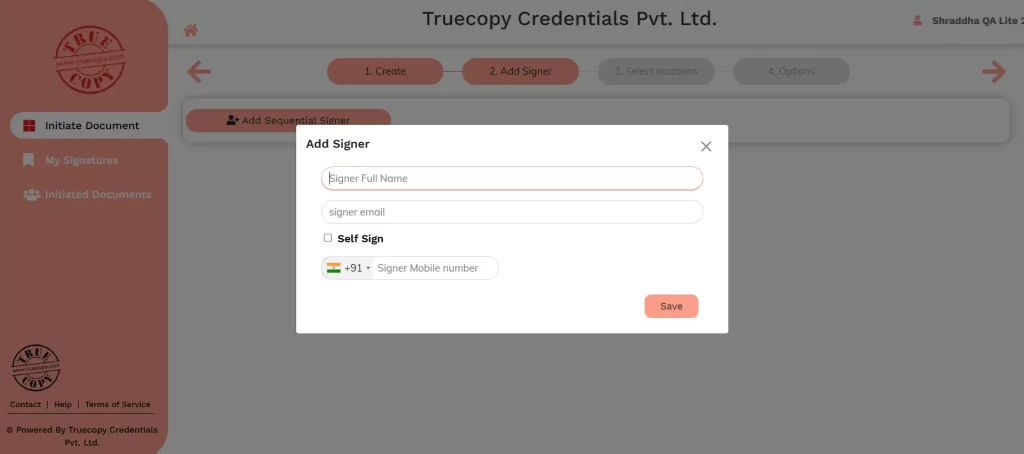
7. To add a signer, click the next button/arrow and proceed. You can use details like the signer name, email address, and mobile number (optional).
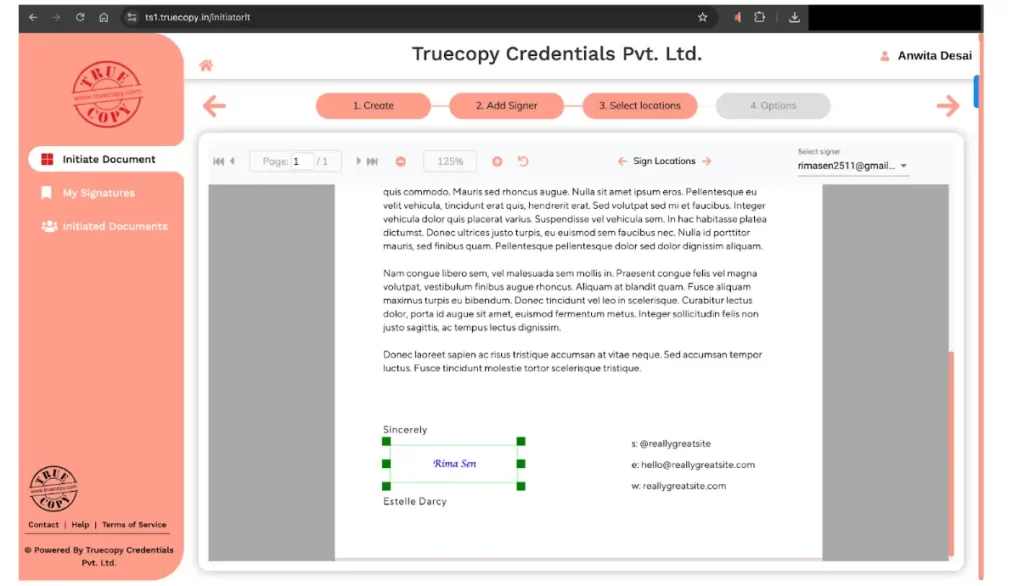
8. After saving the signer’s details, you can double-click on the document and specify the signature location on the document for the signer.
9. After selecting the signature location, you can customize the email received by the signer with the document signing link. After adding the required details, click the ‘Send’ button.
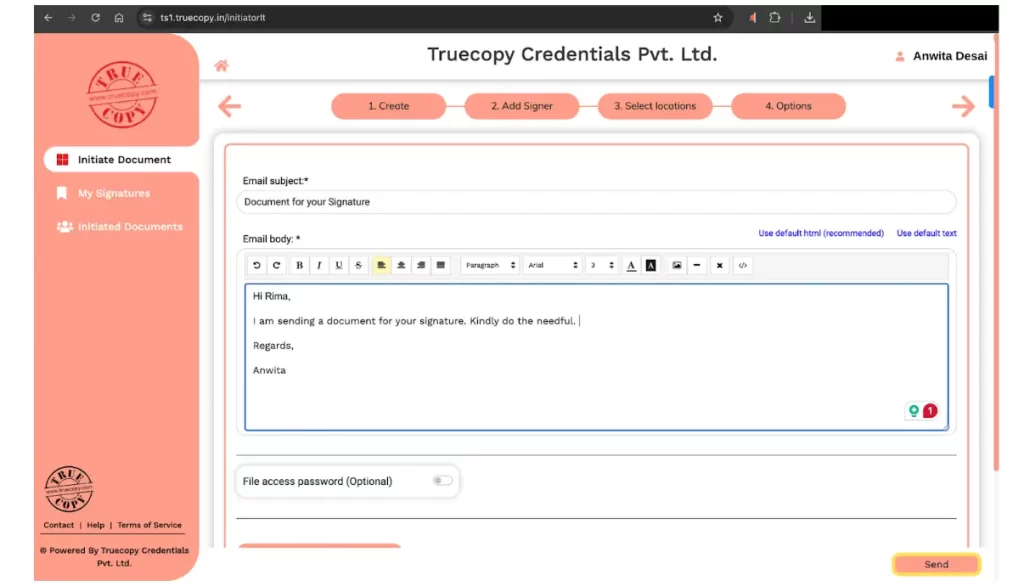
10. After successful initiation, the signer will receive the link to sign the document on the specified email address.
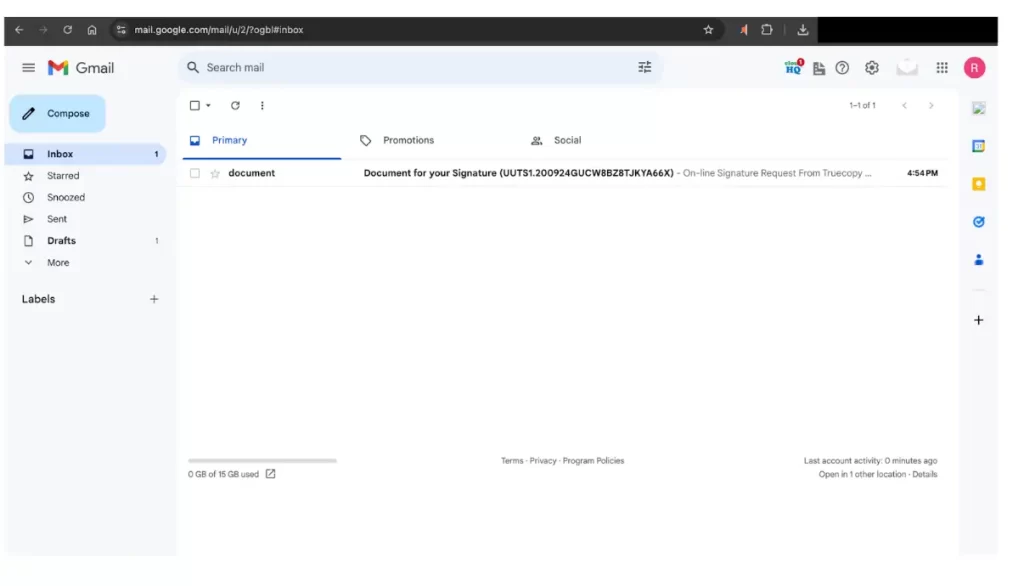
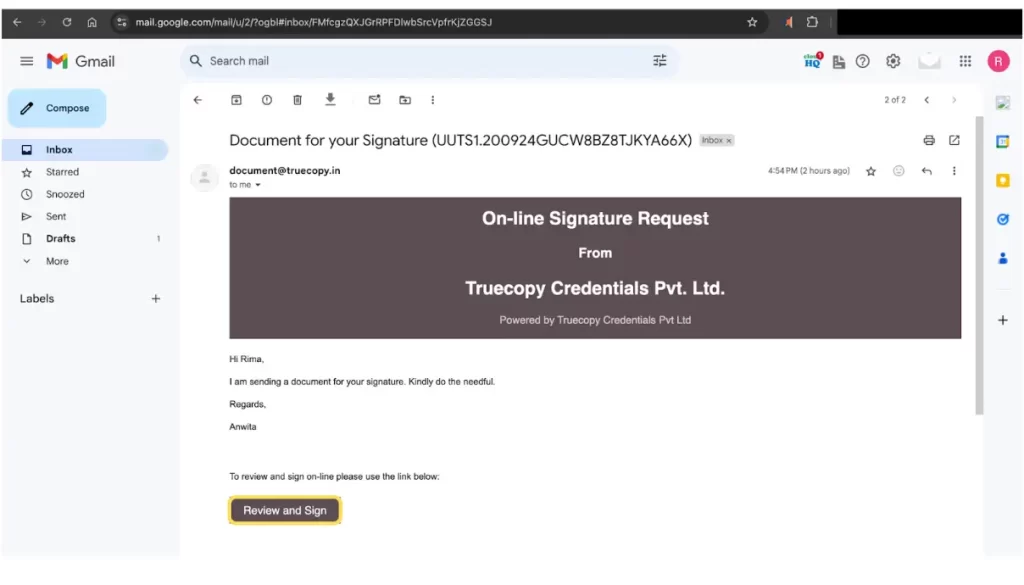
11. The signer can open the email and click the ‘Review and Sign’ button to complete the signing.
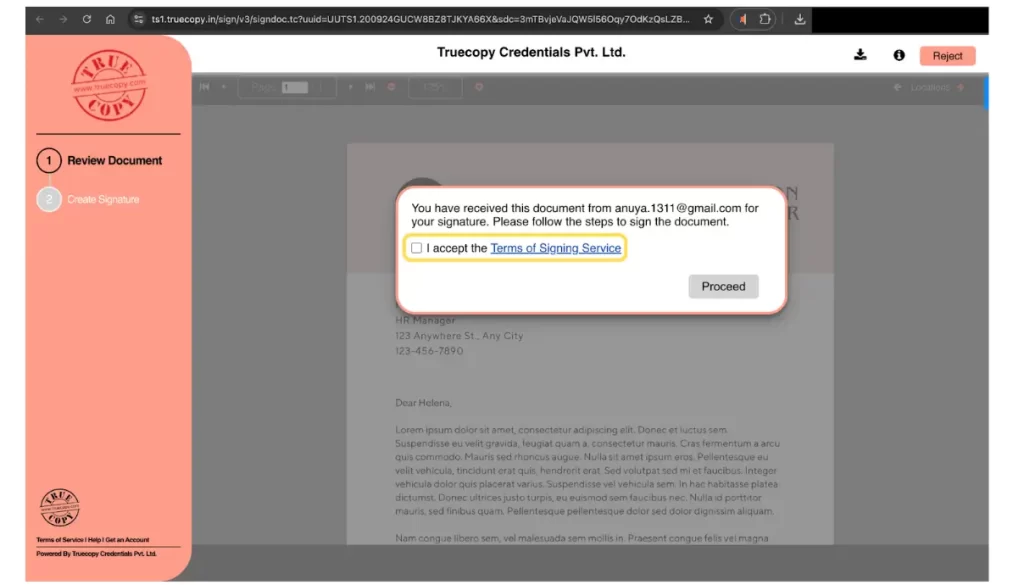
12. The signer needs to accept the ‘Terms of Signing Service’ and click the ‘Proceed’ button.
13. The signer can either select the cursive signature font or upload the signature image from their system or draw the signature and click the ‘Sign’ button to complete the signing process.
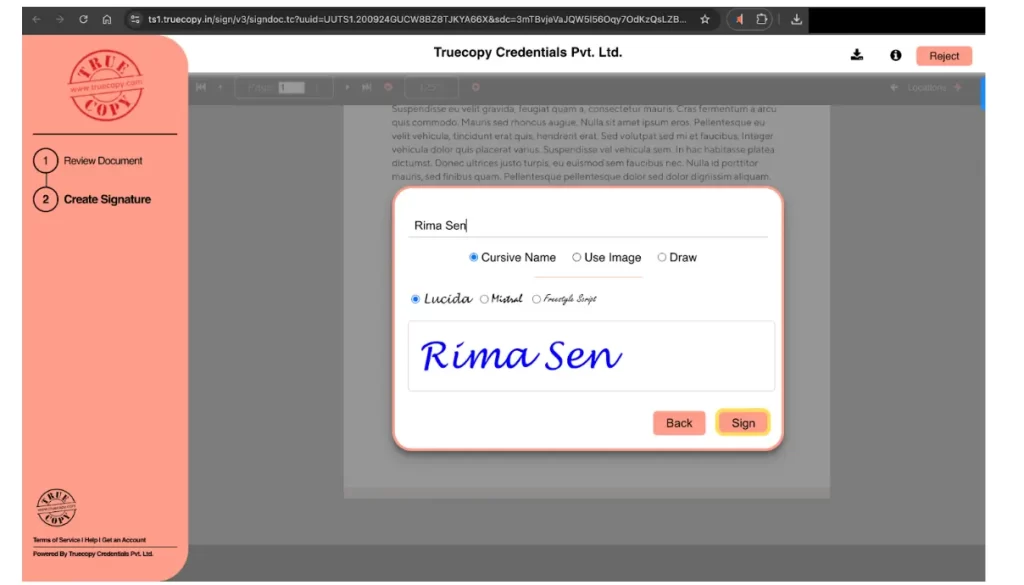
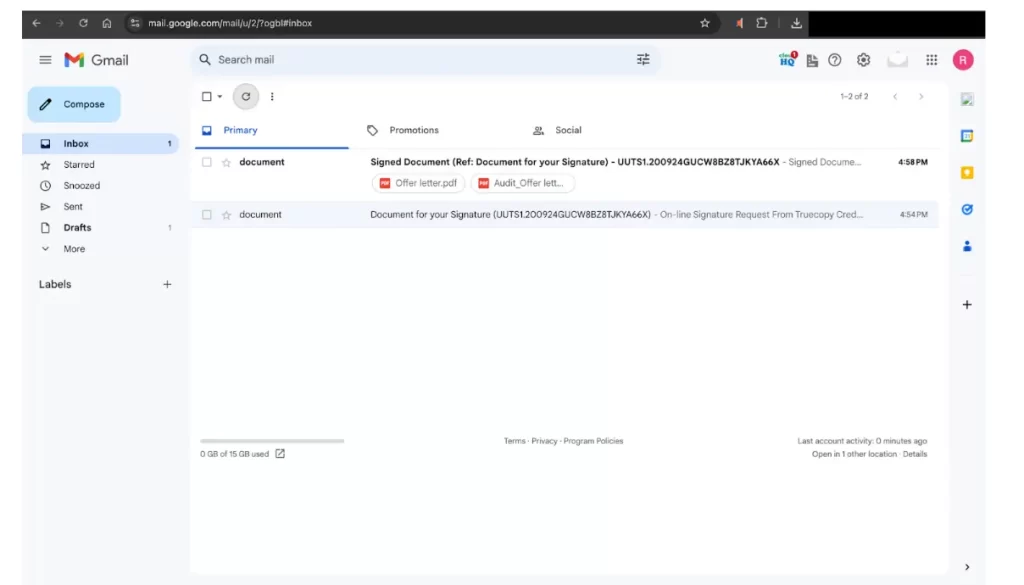
14. After successful signing, the signer will receive an email with the signed file and audit log file attached to it.
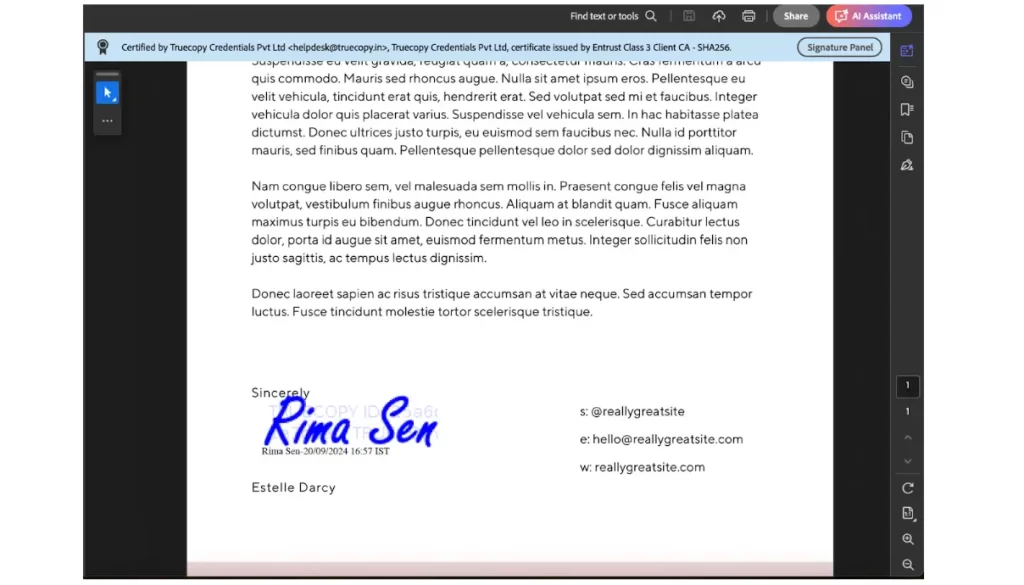
15. This is how the final signed file will look. It has the signature along with the date and time stamp. The signed documents will be certified by Truecopy’s digital signature certificate, which makes the document tamper-proof.
For any further questions or concerns, write to us at helpdesk@truecopy.com
