TRUESigner ONE is an electronic signing solution that integrates seamlessly with HubSpot allowing users to sign documents with ease using either electronic signatures or DSC tokens. By installing TRUESigner ONE, users can eliminate manual signing processes, reduce errors, and enhance productivity.
Here’s a step-by-step guide on how to use TRUESigner ONE from HubSpot
Let’s see how to use TRUESigner ONE from HubSpot to sign documents digitally
Login to your HubSpot account.
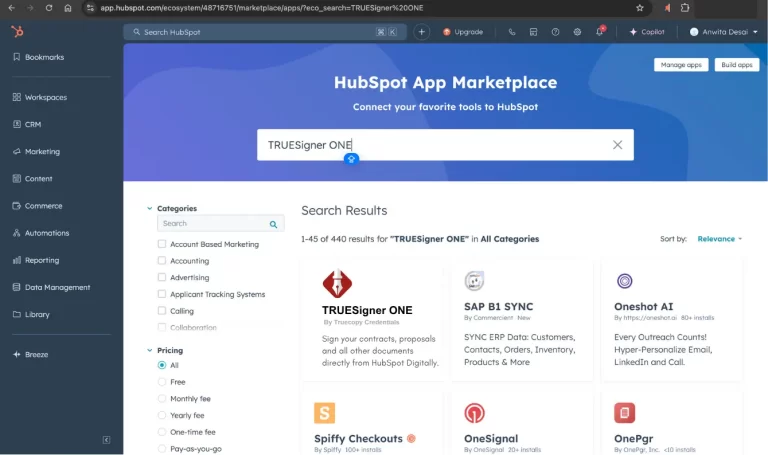
Upon successfully login, visit HubSpot App Marketplace and search for TRUESigner ONE.
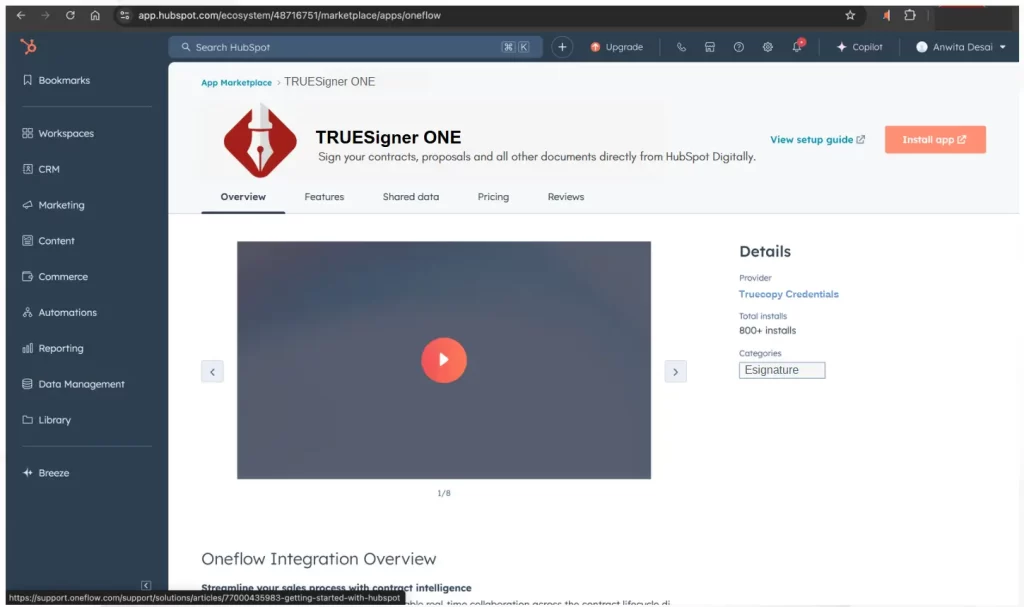
Click on ‘Install App’ to start the installation of TRUESigner ONE.
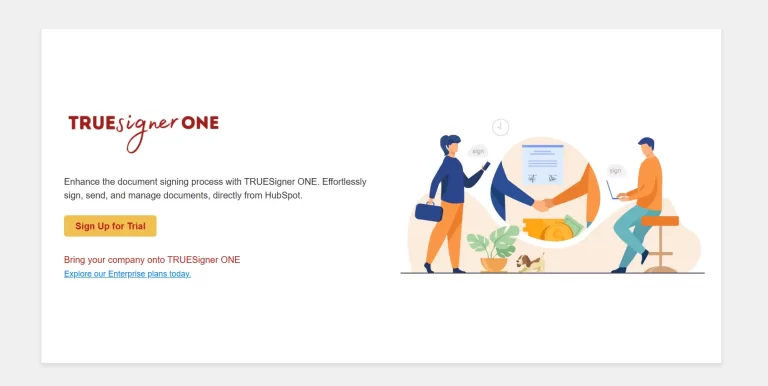
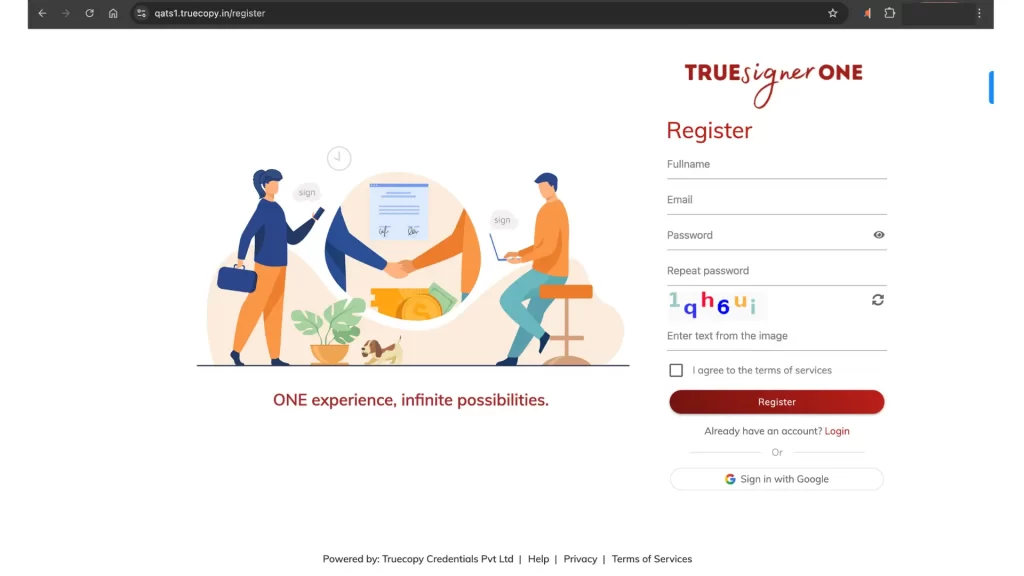
Click the ‘Sign Up’ button to create your trial account with TRUESigner ONE.
Create an account using your email address or sign in using your Google account.
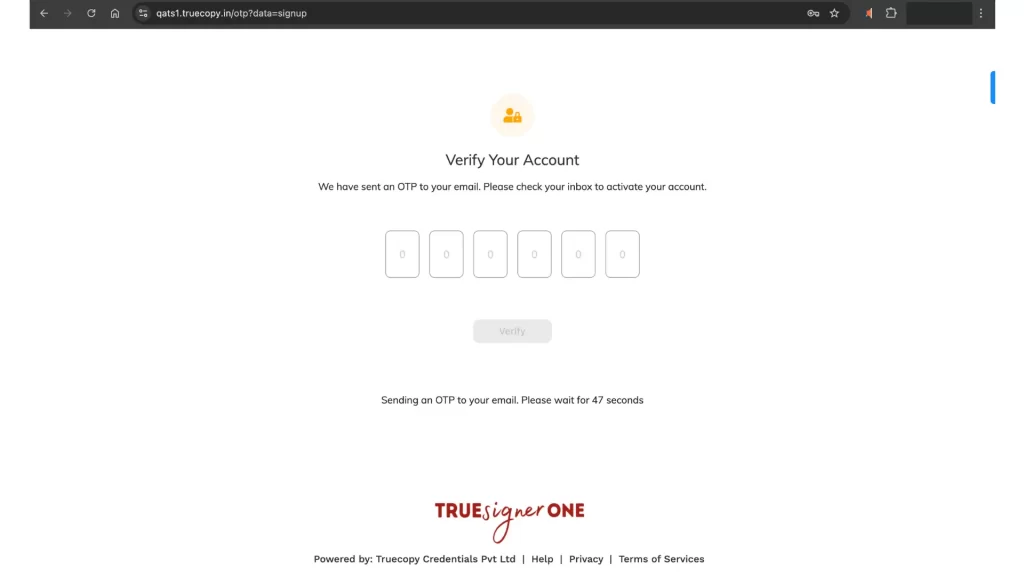
Verify your email address with OTP and proceed.
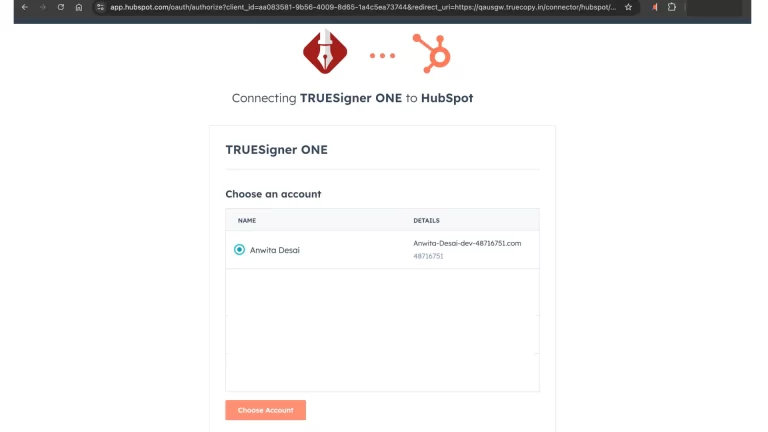
After successfully signing up, choose a HubSpot account to connect with TRUESigner ONE.
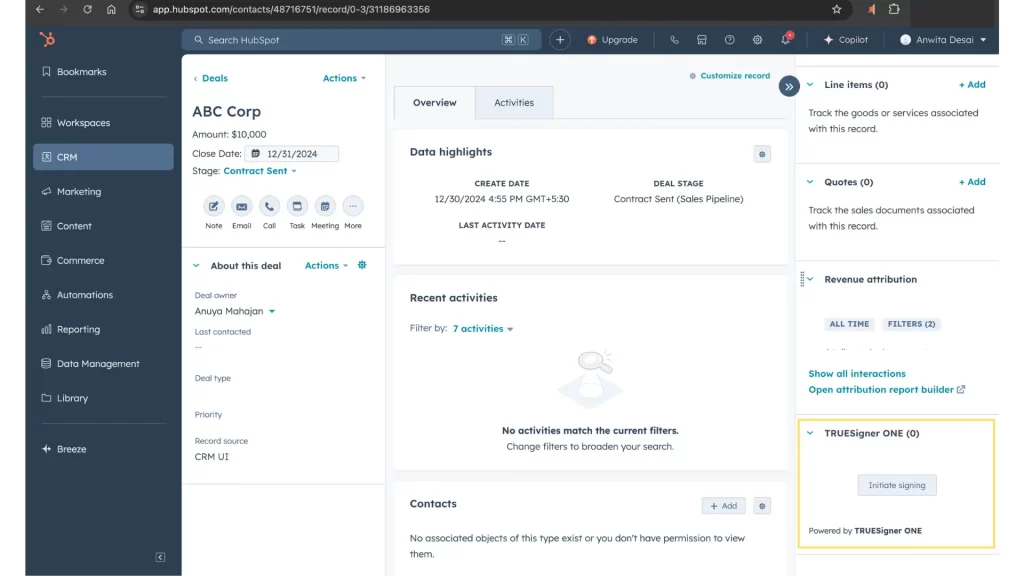
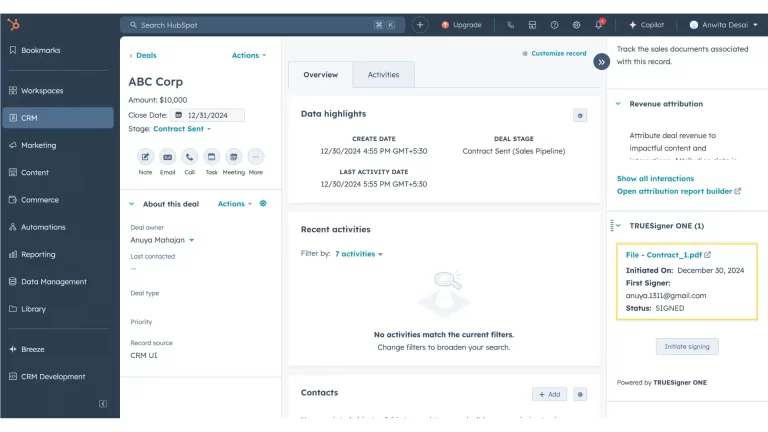
You can see TRUESigner ONE in CRM in the right-hand side panel, where you can initiate signing.
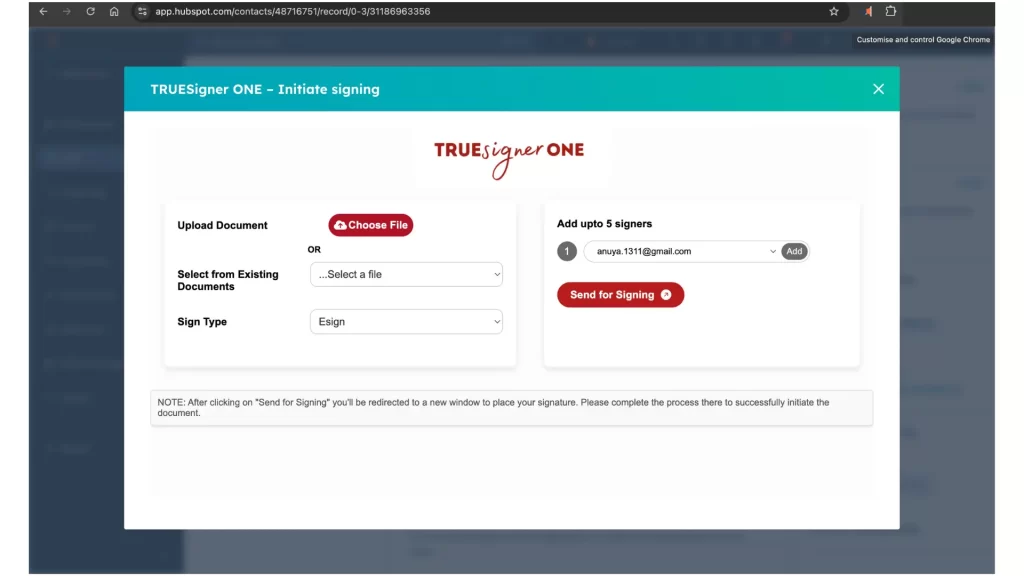
Once you click the ‘Initiate Signing’ button, you can select the file you want to send for signing. Here, you can choose the type of signature & can add up to 5 signers who can sign the file.
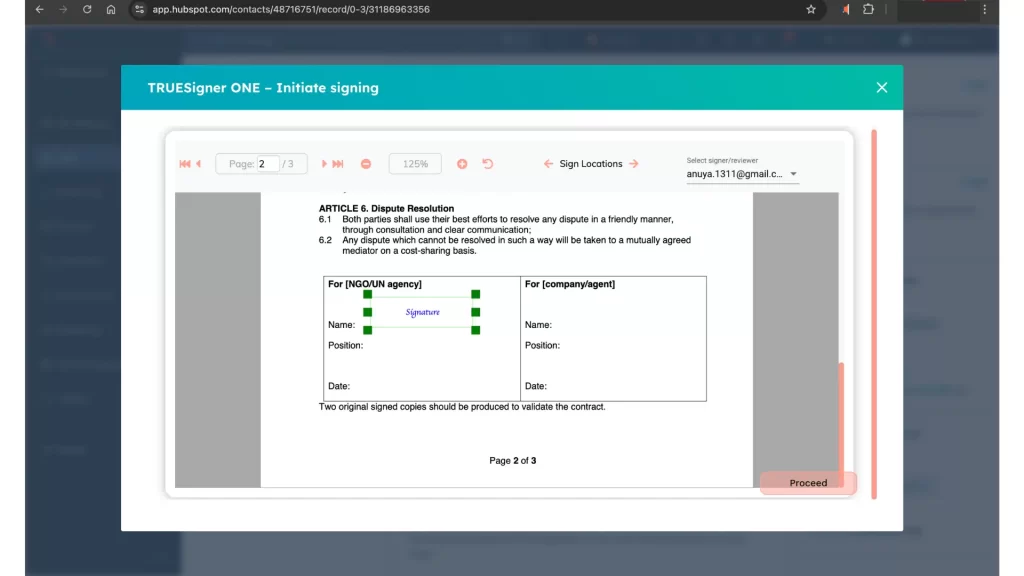
Once you click on the ‘Send Signing’ button, you will be redirected to a new window. In this window, you can double-click on the signature locations for each signer to indicate their locations.
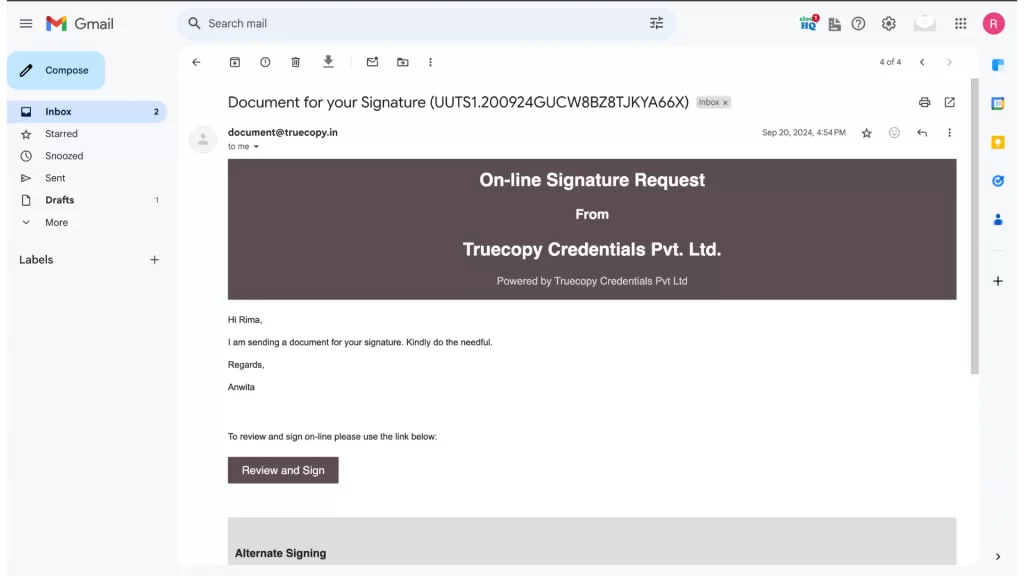
Signers will receive the signing link to sign the document at their respective email addresses.
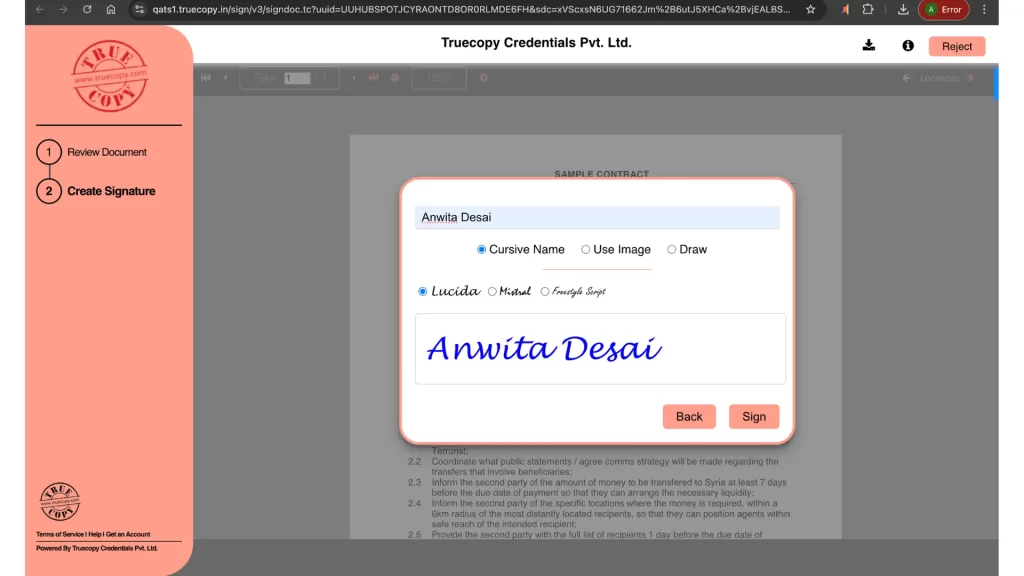
Once signers click the ‘Review and Sign’ button, they will be redirected to the window where they must accept the TOS and add their signatures.
Once all signers complete the sign, the status can be seen in HubSpot right-hand panel.
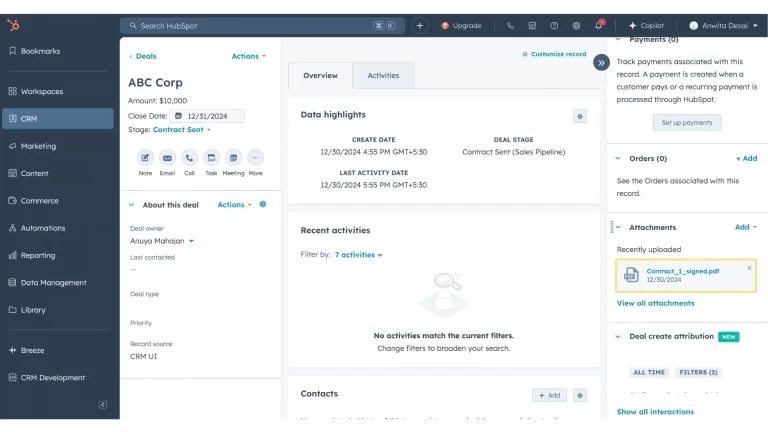
The signed file can be seen in the attachments in HubSpot